


 198 / 418

STEERING
11
REFITMENT:
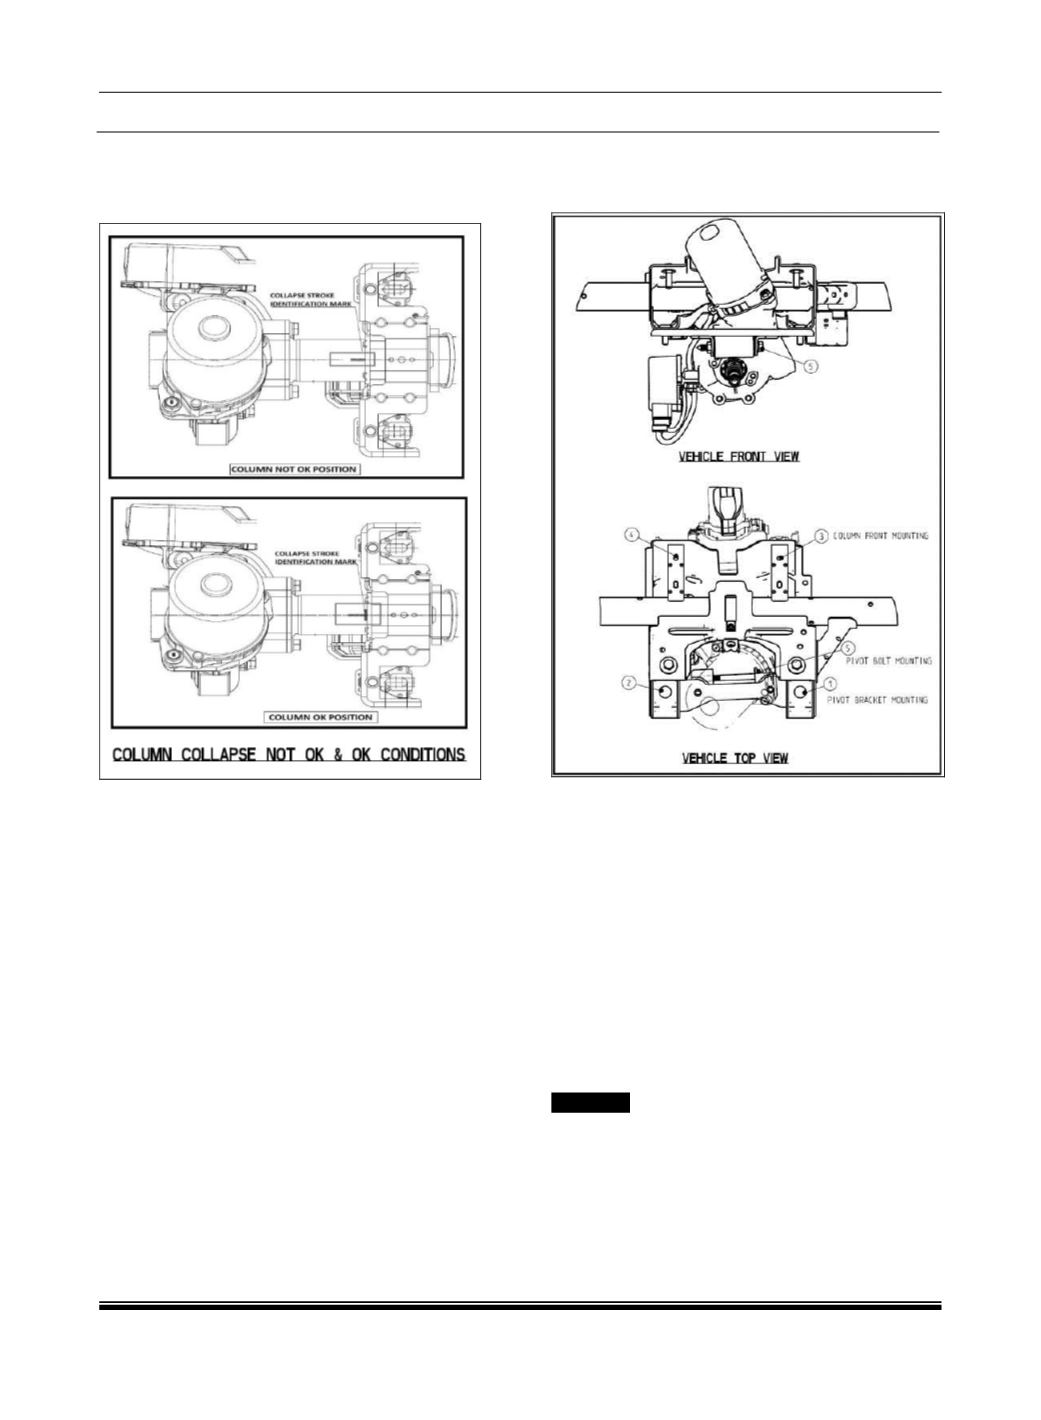
1. Check the column assembly for the collapse
stroke ok position. (refer the Attached image')
2. Check the column ECU connector, torque
sensor and motor wiring harness is in proper
condition.
3. Check no dent mark on Motor and No
damage to ECU.
4. Assemble the steering column and pivot
mounting bracket together with pivot bolt and
tighten threads manually. Unlock the tilt lever.
5. Take the sub assembly of the steering column
with pivot bracket on ccb in vehicle assembly
position and insert the mounting nuts on front
and rear mountings.
6. Hand tighten all the four nuts in front and rear
mountings.
7. Provide 20- 22 nm full torque to pivot bracket
nuts on ccb. (refer the picture for fitment
sequence)
8. Pull the column upwards once manually using
upper shaft.
9. Perform column tilt up and tilt down 2-3 times.
10. Provide 25 nm torque to front mounting nuts.
(refer the picture for fitment sequence).
11. Perform column tilt up & down 2-3 times.
12. Provide 20 -22 nm full torque to pivot bolt.
(refer the picture for fitment sequence).
13. Lastly tilt up the column & lock the tilt lever.
NOTE
Do not swap column
.
CAUTION
UJ Bolt should not be reused during Steering
column refitment.