


 523 / 1131

TRANSAXLE TA6300
24
1.9. REMOVAL OF TRANSAXLE FROM
VEHICLE:
Position the vehicle properly on the two-post lift
and loosen the front wheel nuts. Disconnect the
battery terminals.
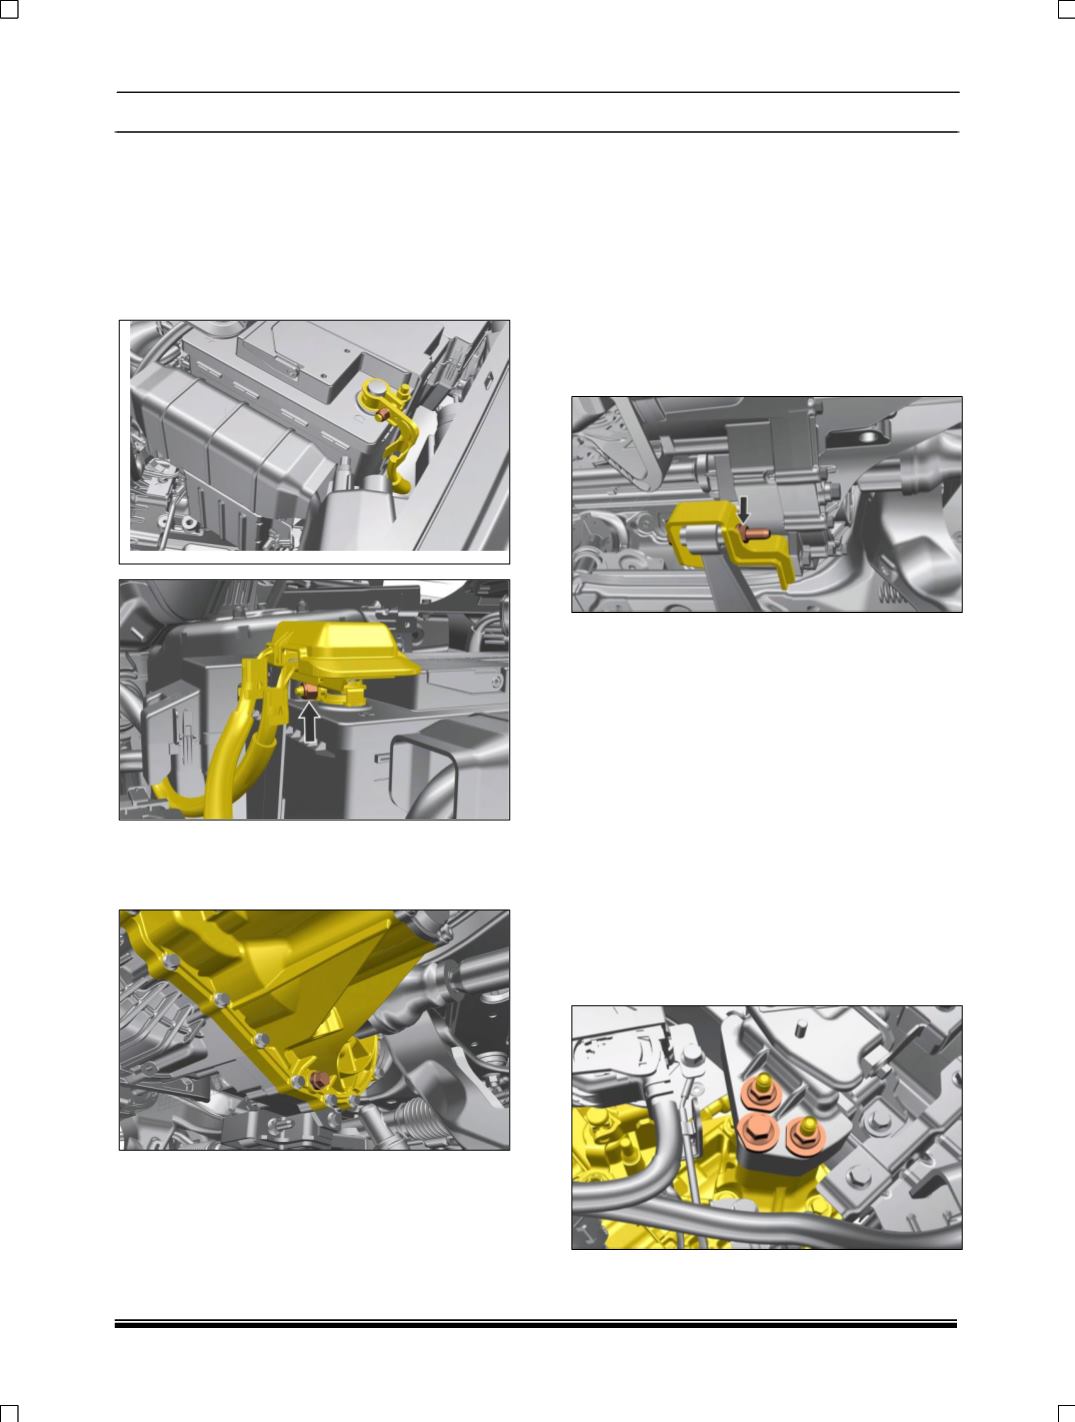
1. Remove the battery connection and remove
the battery & tray.
2. Lift the vehicle on using two-post lift and
remove the front wheels.
3. Drain the Transaxle oil through Drain Plug.
4. Remove the air filter assembly.
5. Disconnect power steering pressure line and
its mounting over transaxle.
6. Remove ball joint (steering rack) from steering
knuckle from both sides.
7. Disconnect gear shifter cables.
8. Loosen mounting bolts of clutch housing.
9. Remove the cooling module of the vehicle
(Refer Remove and Re-fitment of cooling
module in engine).
10. Remove fuel line supporting bracket from
clutch housing.
11. Disconnect high-pressure hose assy. from
clutch release lever.
12. Support engine suitably using engine lifting
crane.
13. Disconnect ‘C’ mount bracket bolt.
14. Disconnect the starter motor electrical
connection & take out Starter motor
15. Disconnect electrical connections of Reverse
Light switch.
16. Disconnect the knuckle lower arm ball joint.
17. Swing out both drive shafts from transaxle
and place it suitably alongside.
Do not pull drive shaft excessively as the
plunge joint will come out of housing and
damage the boot Pry. Plunge joint housing for
taking out joint out of splines. Do not place the
CV drive shaft on rough / uncleaned surfaces.
This might damage the drive shaft boot.
18. Lift and support the engine assembly suitably
on vehicle.
19. Loosen and remove B Mount Bracket. With
rubber pad.
20. Remove clutch housing mounting bolts and
take out the transaxle.