


 839 / 1034

ELECTRICAL
218
Step 5:
Clean the inside holder area with a cloth to ensure no dust particle resides inside.
Step 6:
Push the sensor (From bumper B surface) into the holder and do the snap fit.
While pushing the sensor, see (from bumper A surface) slip ring flushness to be maintained with bumper
surface.
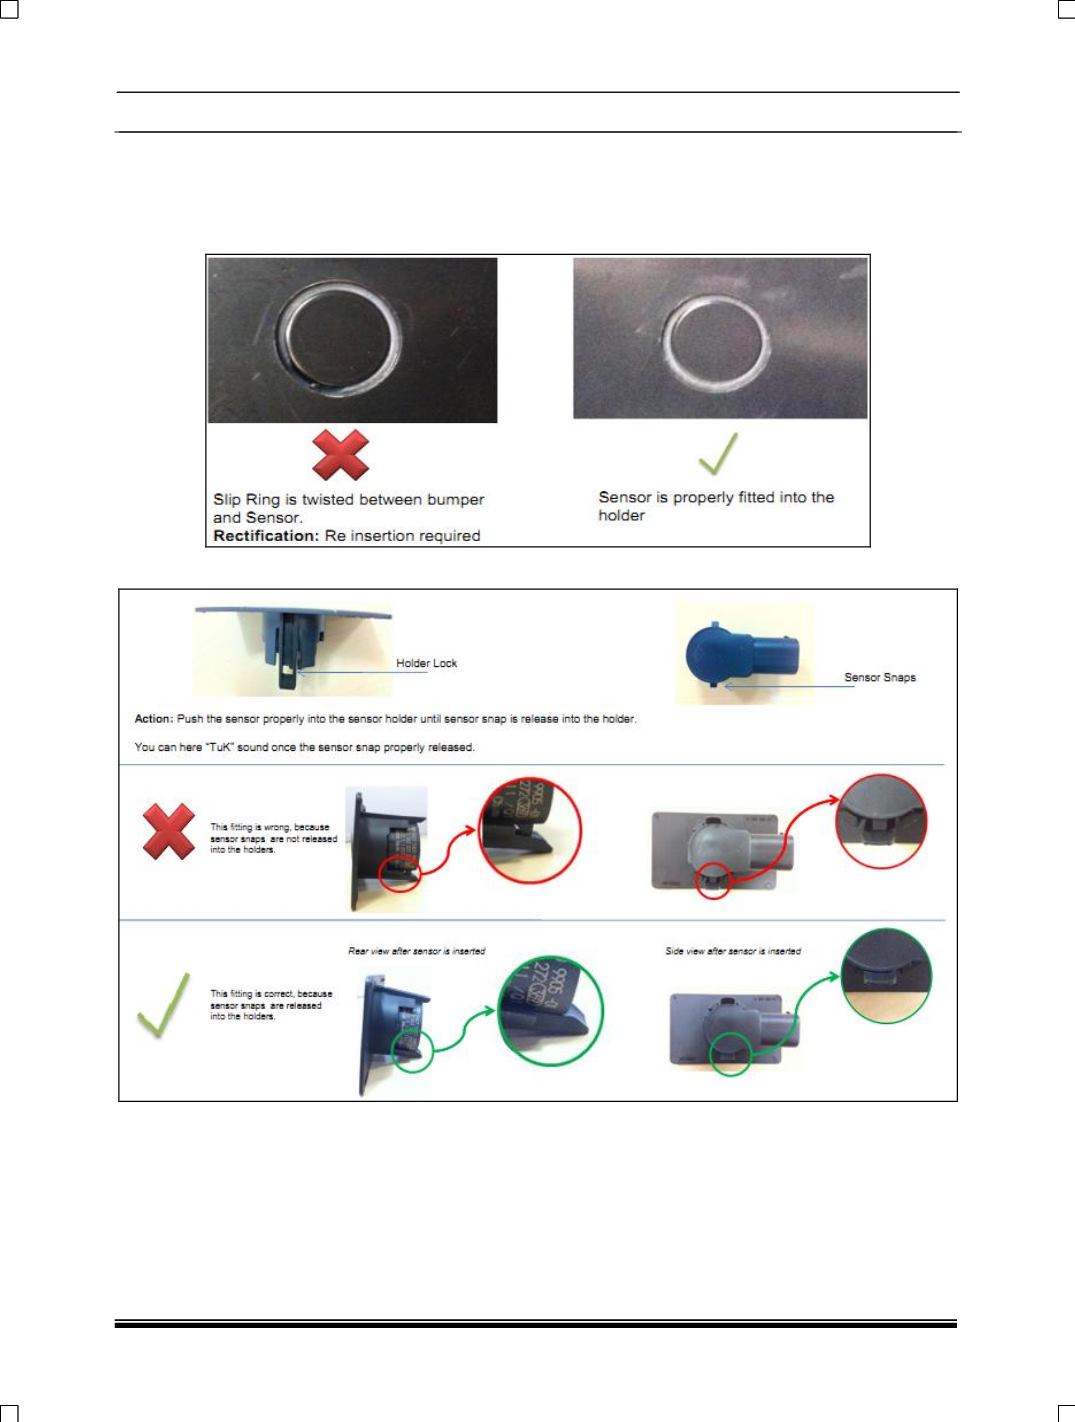
Step 7
: After step 6, please ensure sensor is fitted into the holder or not. See below image.
Step 8:
Check wiring harness is fitted properly or not
Step 9:
Activate park assist system, and check in Head Unit, whether sensor able to detect or not. This is to
ensure, you have done proper fitment.
Step 10:
In music system if HMI shows all sensors areas screen, it means, sensor are connected properly.
Then Go to Step 11.
If “critical fault” appears on the screen, Check DTCs again if that particular sensor showing faulty or not. If
Yes, do the re fitment. Else replace with other another new sensor.