


 12 / 1906

GENERAL
5
2.3 RECOMMENDATIONS
Lamp Condensation/Fogging Condition-
Condensation is a natural phenomenon in Lamps.
This occurs mainly because of atmospheric condi-
tion/weather change. During normal condensation,
thin film of mist is visible on the inside surface of the
exterior plastic lens. Generally, this condition is con-
sidered normal & can be eliminated by turning on the
Headlamp with engine running or during normal driv-
ing conditions.
Note:
Headlamp fogging/condensation is a natural
occurrence & Headlamp assembly replace-
ment will not be necessary to resolve the
issue.
High pressure washer jet direct on vent sys-
tems of lamp are not recommended, there
might be possibility to water ingress causing
heavy fogging.
2.3.1 REPAIRS AND REPLACEMENT
The following precaution and practices should be
followed in order to reduce risk and conduct efficient
and correct repair.
1. Go through the precaution and general infor-
mation section given for that particular system or
repair in this Workshop Manual.
2. Only
TATAGENUINE SPARE PARTS
should be
used. Similar parts of other models should not be
used, unless they have the same part number.
3. Do not use standard tools where special tools are
recommended.
4. Whenever any hose is disconnected attach a tag
to identify it.
5. Plug the ports, plugs and other openings of ag-
gregates like FIP, TMC, etc. when remove from
the vehicle.
6. When an assembly is dismantled, all reusable
parts should be arranged in the sequence of its
assembly in a clean enameled tray, in order to fa-
cilitate the assembly.
7. Do not use jack to lift the vehicle for any jobs to
be carried out beneath the vehicle, always use
lifts.
8. Disconnect the battery before conducting any
repairs.
OIL SEALS
NOTE
Ensure that the seal is free from pits, scores, corro-
sion and general damage prior to fitting replacement
seal.
1. Always replace oil seals when rebuilding an as-
sembly.
2. Carefully examine seal before fitting to ensure
that it is clean and undamaged.
3. Coat the sealing lips with clean grease; pack
dust excluder seals with grease.
4. Ensure that seal spring, if provided, is correctly
fitted.
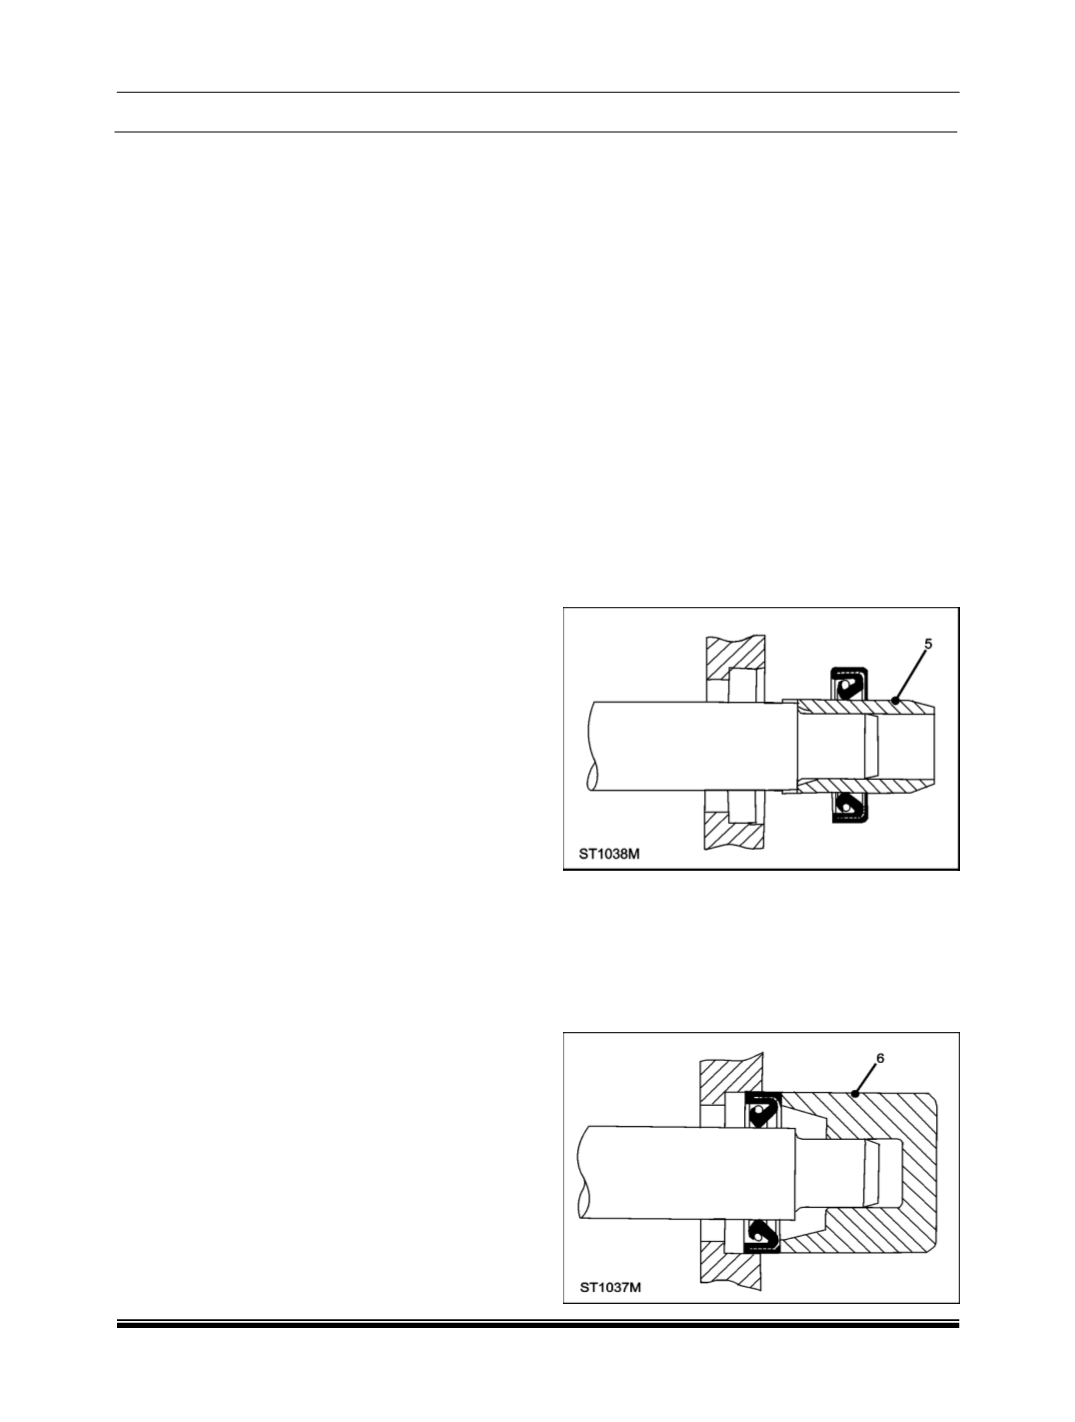
5. Place lip of seal towards fluid to be sealed and
slide into position on shaft, using a fitting sleeve
(5)
when possible to protect sealing lip from
damage by sharp corners, threads or splines. If
the fitting sleeve is not available, use plastic tube
or tape to prevent damage to sealing lip.
6. Grease outside diameter of seal, place on the
housing and press into position, using great care
and if possible a ’bell piece’
(6)
to ensure that
seal is not tilted. In some cases, it may be pref-
erable to fit seal to housing before fitting to shaft.
Never let weight of unsupported shaft rest in
seal.