


 797 / 1236

ELECTRICAL
19
ELECTRICAL
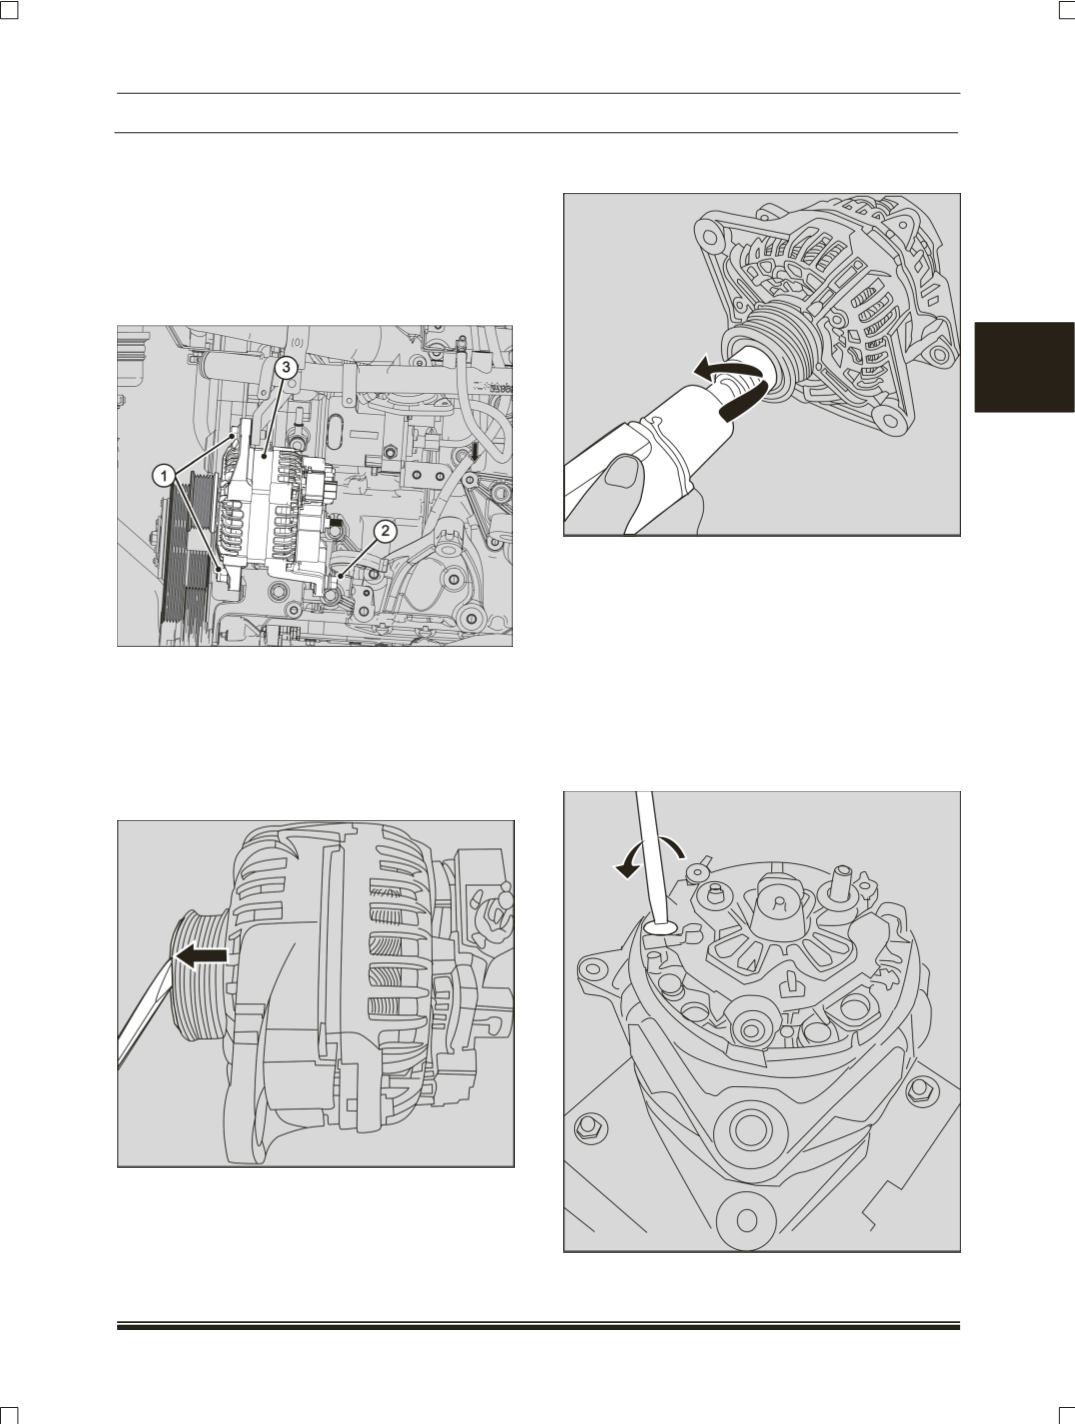
REMOVAL:
1.Remove the Alternator belt
(Refer alternator belt
removal procedure).
2.Disconnect the electrical connection.
3.Loosen and remove the front mounting bolts (1)
and the rear mounting bolt (2) to remove the
Alternator (3).
DISMANTLING PROCEDURE
1. REPAIR INSTRUCTIONS:
1.1 Dismantling of protective cap For OAP:
To dismantle the inner Snapping Protective cap,
the elastomer membrane is pierced with a sharp
tool (
Screw Driver
) as shown in the fig.
1.2 Dismantling of Overrunning Pulley
:
Hold the alternator pulley by hand or with a pulley
holder, using the serration tool overrunning
alternator pulley can be unscrewed from the
alternator shaft.
NOTE:
Assembly/dismantling tool is to be designed with
serration in accordance to DIN 5487-7X20.
Mounting chamfer in radial and axial are
recommended in the area around the serrations.
1.5 Dismantling of Rectifier:
For removal of rectifier, it is essential to desolder
the six stator winding ends from it. After de-
soldering the winding ends, unscrews to take out
the rectifier.