


 1247 / 1525

ENGINE
80
Fig. 1
Fig. 2
Fig. 3
ROCKER ARM ASSEMBLY AND PUSH
RODS
ROCKER ARM ASSEMBLY AND PUSH RODS
REMOVAL AND INSPECTION
(Cylinder head cover removed)
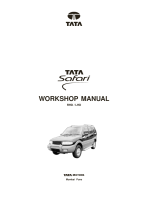
1 Unscrew rocker arm bracket mounting bolts and
remove. Fig. 1.
2 Remove rocker arms with shaft and brackets.
3 Remove push rods and arrange them serially by
suitable marking. Push rods should be removed
carefully since tappets might get pulled along with
it.
4 Remove grub screws holding rocker shaft in rocker
arm brackets and take out rocker arm shaft
brackets, rocker springs and spring clips. Fig.2.
5 Compare free length of rocker springs and
replace defective ones. Check rocker shafts for
wear on rocker arm bearing surfaces and replace
shafts, if necessary.
6 Check expansion plugs at extreme ends of rocker
shaft for proper sealing and replace, if necessary.
7 Check rocker arms for wear on threads, replace
rocker arm if threads are damaged.
8 Check fit of rocker arm bush in its parent bore. If
bush has turned in rocker enlarging parent bore,
replace rocker arm.
9 Measure inside diameter of bush. Replace bush, if
worn out, taking care that oil hole in bush and
rocker arm are aligned. Ream new bush to size.
10 Check rocker arm tips for wear and pitting. Slight
- wear on rocker arm tips may be corrected by
dressing it to a radius of 15 mm. Replace rocker
arm if there is heavy pitting/wear.
11 Check ball pins of adjusting screw for thread wear/
damage. Replace, if necessary.
12 Check rocker end of push rod for excessive wear,
pitting/scoring. Replace push rods, if necessary.
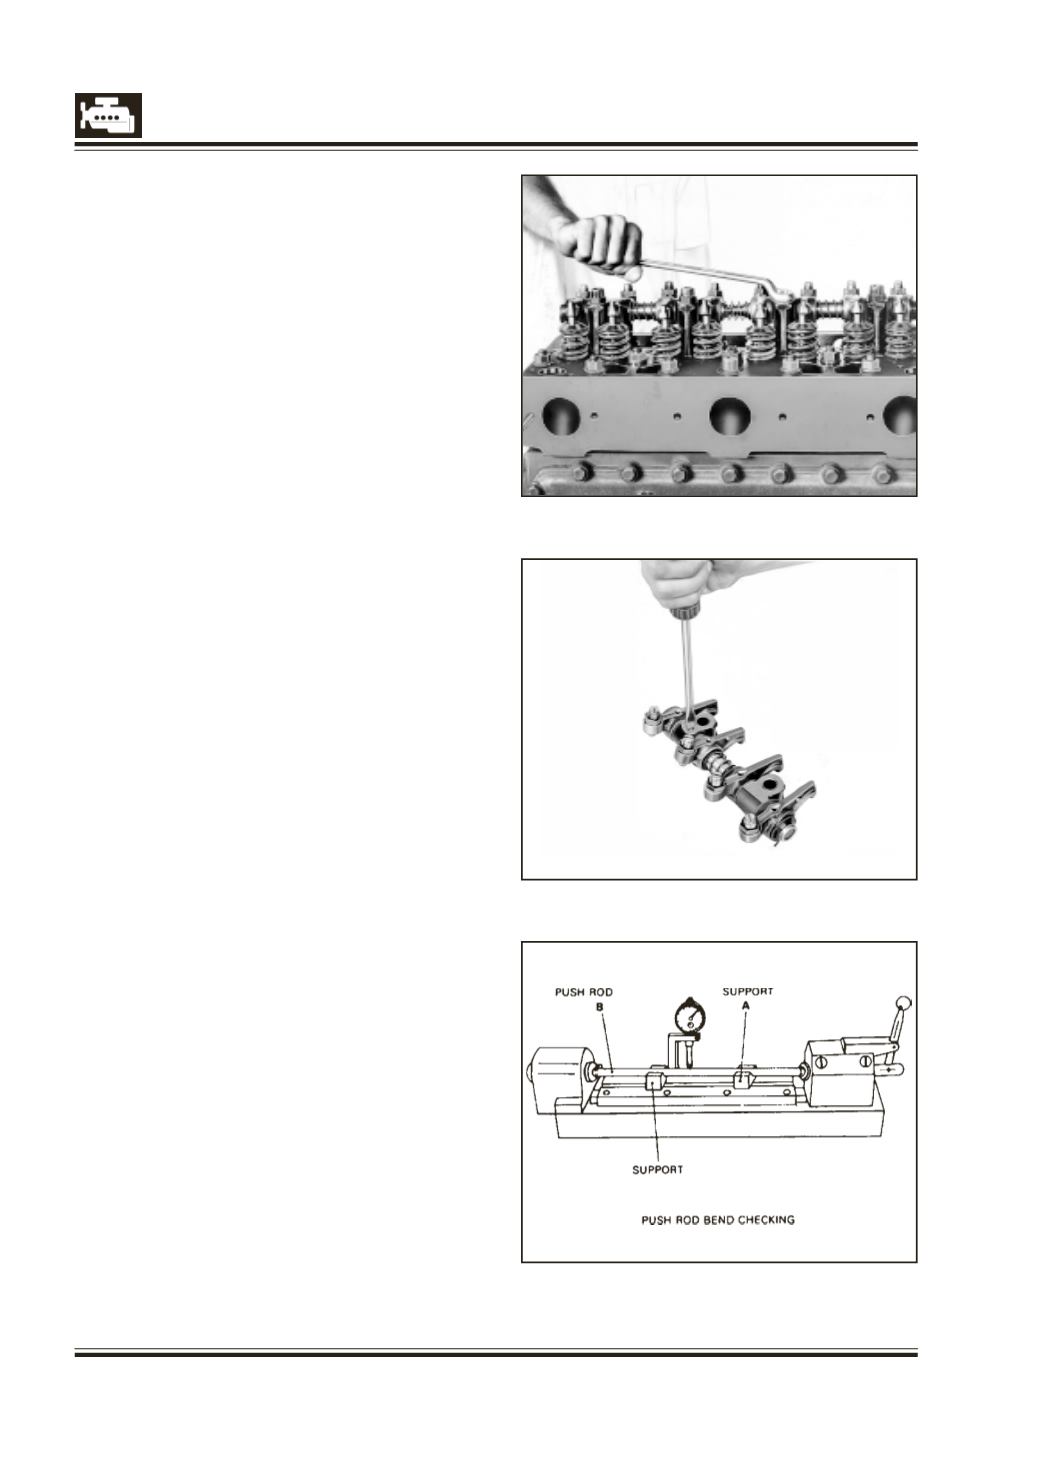
13 Check push rods for straightness Fig.3 Bent push
rods with ball and sockets in good condition can
ba straightened in cold condition. The movable
supports At and B’ in relation to fixed guide
supports in the fixture represent the centre line
for push rod, if bends have been ascertained,
displace supports under the bend portion and
straighten the bend by slight hammer blows.