


 671 / 1588

21
ELECTRICALS
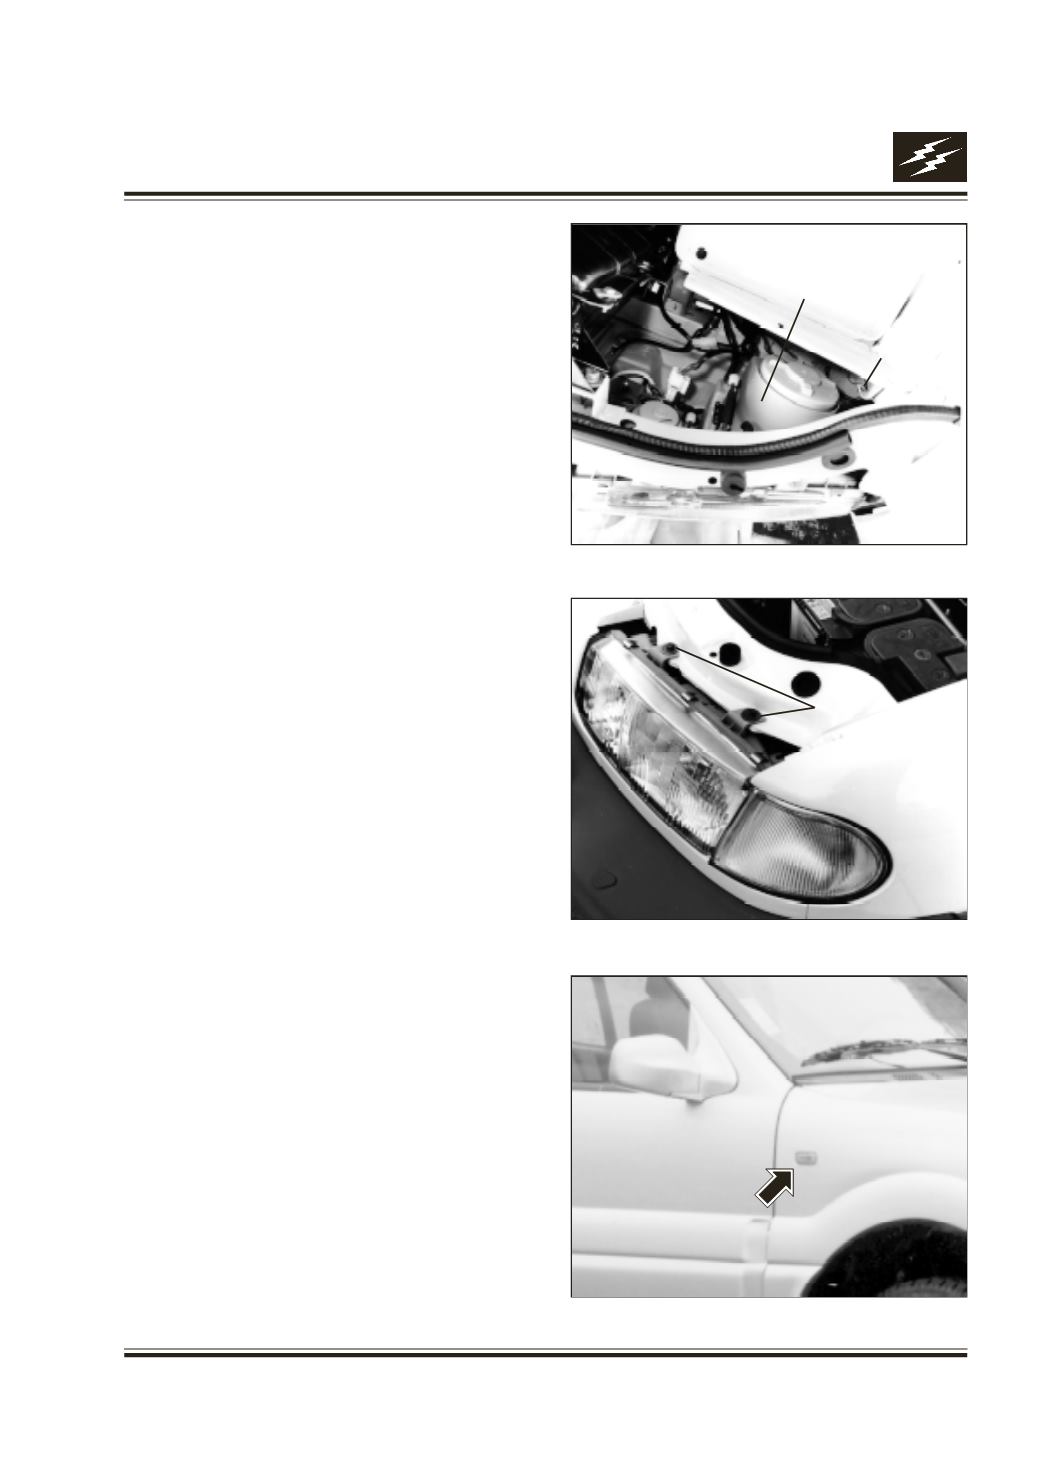
10. HEAD LAMP / TAIL LAMP ASSY. :
Fitment
(Head Lamp & Blinker) Fig. 14, 15 & 16
l
Locate the spring mounting bracket on the holes
in the panel and tighten the bracket with the
fasteners.
l
Insert the Head Lamp into the cutout for the Head
Lamp and align the four mounting locations.
l
Tighten the lamp with the fasteners.
l
Locate the Blinker in the locating panel.
l
Insert the Blinker into the slots in the Head Lamp.
l
Clamp the Blinker spring into the spring locating
bracket.
l
Connect the respective connectors for the Head
Lamp and Blinker
l
Check for the proper fitment of the Blinker by
ensuring proper engagement of the spring and
the Blinker locating lug.
Remove
(Head Lamp & Blinker)
Please follow reverse procedure for fitment.
Fig. 15
Fig. 16
Fig. 14
Head Lamp Assy.
Head Lamp
Mounting
Screws
Blinker Spring
Side Repeater Lamps :
Removal :
Use a small screw driver to push in and release the
catch and take out the lamp. Fig. 16
Pull out the 2 pole connector and take out the lamp
Fitment :
Connect the two pole connector and insert the lamp
into the cutout and press till the catches hold.