


 505 / 1588

30
BRAKES
OVERHAULING OFTANDEM MASTER CYLINDER
Master cylinder should be overhauled as per
recommended service schedule during overhaul, all
internal parts including plungers and springs should
be replaced with genuine parts provided in the kit.
Subsequently, if the condition of the bore is
satisfactory fur ther overhauling should be
undertaken, or else, the whole cylinder should be
discarded and fitted with new assembly.
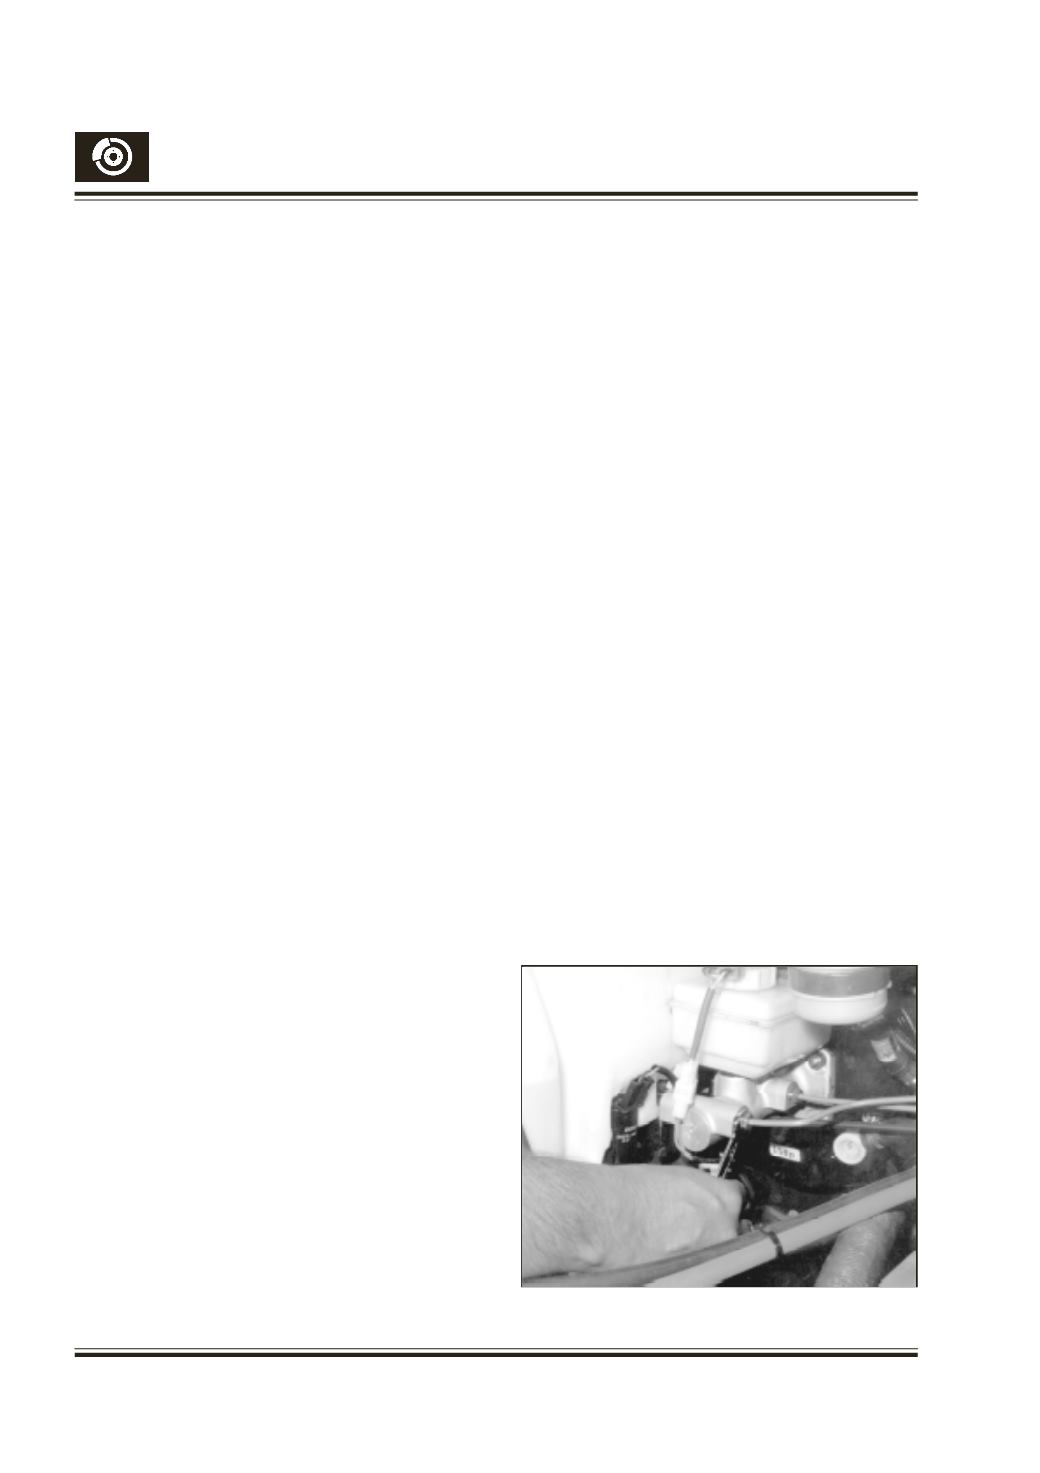
REMOVAL OF TANDEM MASTER CYLINDER
Connect a transparent (Vinyl) bleed tube to one of
the rear wheel cylinder’s bleed screw and drain the
fluid into a container by pumping the pedal, from the
primary circuit. Repeat the same by connecting the
bleed tube to one of the front wheel cylinder’s bleed
screws and collect the fluid from the secondary
circuit. Disconnect all outlet pipes from the master
cylinder. Fig. 31. Loosen master cylinder mounting
nuts and remove the same.
DISMANTLING OF TANDEM MASTER CYLINDER
Fig. 32
Clean the tandem master cylinder assembly
externally with alcohol or fresh brake fluid before
dismantling it. Hold the fluid reservoir and by rocking
it on either side, lift the same out of the grommets
in the tandem master cylinder. Remove both the
grommets from the master cylinder body using a
connector screw driver with blunt edge. Remove
the ‘O’ ring fitted in the groove on the mounting flange
with a blunt edge pin. Remove the residual pressure
valve from the primary outlet port. Slightly push the
primary plunger with a round rod, hold it in depressed
position and remove the stop pin with gasket.
Without removing the stop pin, if any attempt is
made to dismantle the tandem master cylinder, the
secondary plunger, cannot be removed. Remove the
adaptor from the secondary outlet.
Then, clamp the cylinder (housing) in a vice with
soft jaws. With the help of circlip plier, remove the
circlip. Remove the complete primary plunger
assembly out of the bore. Remove the stop washers
intermediate ring and the primary back seals out
from the shaft of the primary plunger. Remove the
cylinder from the vice. Tap the cylinder, bore facing
downwards, on a wooden block to allow the
secondary plunger and the return spring to slide out
of the bore.
Clean the cylinder bore in fresh brake fluid or alcohol
and blow with compressed air. Be sure that the four
holes (two cut off holes and two feed holes visible
through the primary and secondary inlet ports) in the
cylinder body are clean, by blowing dry compressed
air. Do not poke the holes with sharp instrument. Blow
breather hole at the flange and make sure it is clear.
INSPECTION OF TANDEM MASTER CYLINDER :
Examine the bore of the tandem master cylinder. If it
is not scored, ridged or corroded and is smooth to the
touch, the master cylinder can be reassembled using
the appropriate parts from the repair kit. If there is
slightest doubt about the condition of the bore like
having deep grooves or pitting marks, there is no other
way than to fit a new master cylinder assembly.
If contamination is observed in the removed seals
(normally they would have swollen and can be
compared with new seals from the kit which will tell
clearly that the size is enlarged), the entire system,
i.e. wheels cylinder rubber parts including both front
and rear hoses must be discarded and the entire
system should be flushed.
CAUTION :
Do not use kerosene (or) petrol (or) any other mineral
oils to clean the cylinder and its internal parts. As it
will lead to contamination and damage of rubber parts.
Clean all dismantled par ts with alcohol or
recommended fresh brake fluid only.
Fig. 31