


 1562 / 1588

11
BODY
l
Complete the electric connection of door mirror
through the hole provided and fit the plastic cover
from inside for front door.
l
Connect all other electrical components'
connectors to wiring harness properly. If necessary
pull out the required portion of plastic membrane
and fix it after completing the electrical
connections. Refer electrical group for wiring
harness front/rear door.
l
Fix the wiring harness clamps on the door properly.
l
Fit the door trim. Refer “Removal/installation of
front/rear door inner trim”.
Note :
For door adjustment, loosen thehingemounting screws
on pillar.Align and adjust the door properly and tighten
the mounting screws. If required remove the fender for
adjustment of front door.
Top and bottom hinges are not interchangeable. In
case hinges are required to be removed mark their
positions and ensure that they are fitted in their
respective positions.
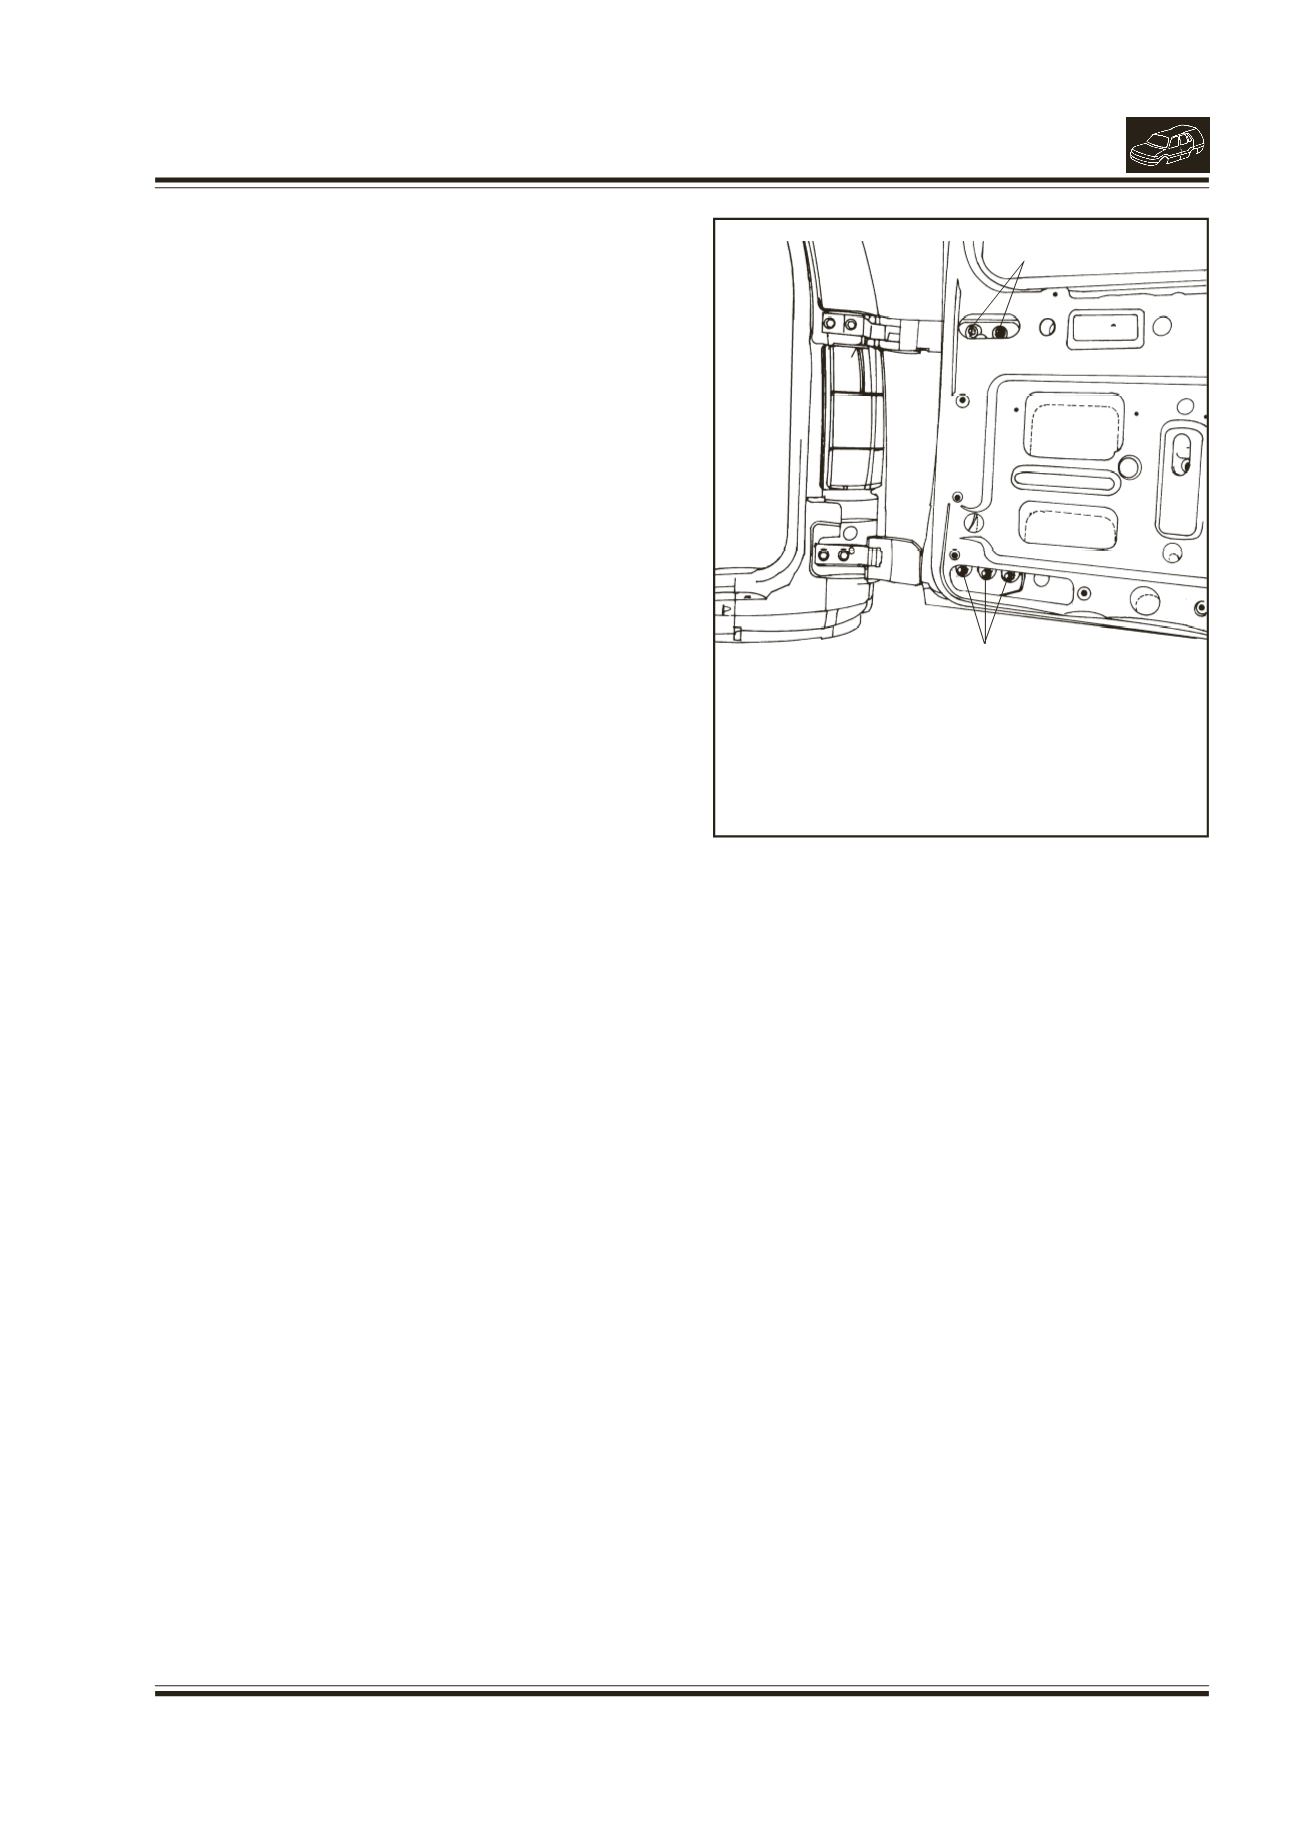
6. REMOVAL / INSTALLATION OF TAIL GATE
(Fig. 6)
REMOVAL
l
Remove the spare wheel.
l
Open the tail gate and remove tail gate inside
trims. Refer 'Removal / Installation of tail gate inner
trims'.
l
Disconnect all connectors of electrical
components inside the tail gate. If necessary pull
out the required portion of plastic membrane.
l
Disconnect rear window washer tube. Plug the
tube suitably.
l
Remove the wiring harness by pulling out clamps.
l
Remove the plastic membrane.
l
Remove the rear wiper arm.
l
Remove spare wheel trim upper, trim middle and
trim lower after removing mounting nuts (trim
upper is fitted with a screw and 3 nuts).
l
Unscrew 6 mounting screws and remove spare
wheel carrier.
l
Remove rubber grommet provided on the tail
gate for wiring harness.
l
Take out wiring harness from the tail gate
through hole.
l
Remove mounting screw securing check strap /
tail gate balancer rod on the floor.
Fig. 6
1.
MOUNTING NUTS OF TOP HINGE
2.
MOUNTINGNUTS OF BOTTOMHINGE
1
2
l
Support the tail gate properly, remove top and
bottom hinges mounting nuts from the tail gate.
l
Remove the tail gate.
INSTALLATION
l
Locate the tail gate on the hinges.
l
Fit the tail gate on top and bottom hinges using
3 flanged nuts for each hinge.
l
Ensure proper alignment of the tail gate and
tighten the nuts.
l
Fit and tighten check strap / balancer rod
mounting screw on the floor.
l
Insert wiring harness through grommet into the
hole provided for harness on the tail gate. Fit the
grommet on tail gate.
l
Fit the spare wheel.
l
Fit spare wheel trimmiddle, trim upper and trim lower.
l
Fit rear wiper arm.
l
Apply Butyl Mastic sealant on the tail gate inner panel
and fix the plastic membrane on it.