


 434 / 896

446
SUSPENSION SYSTEM
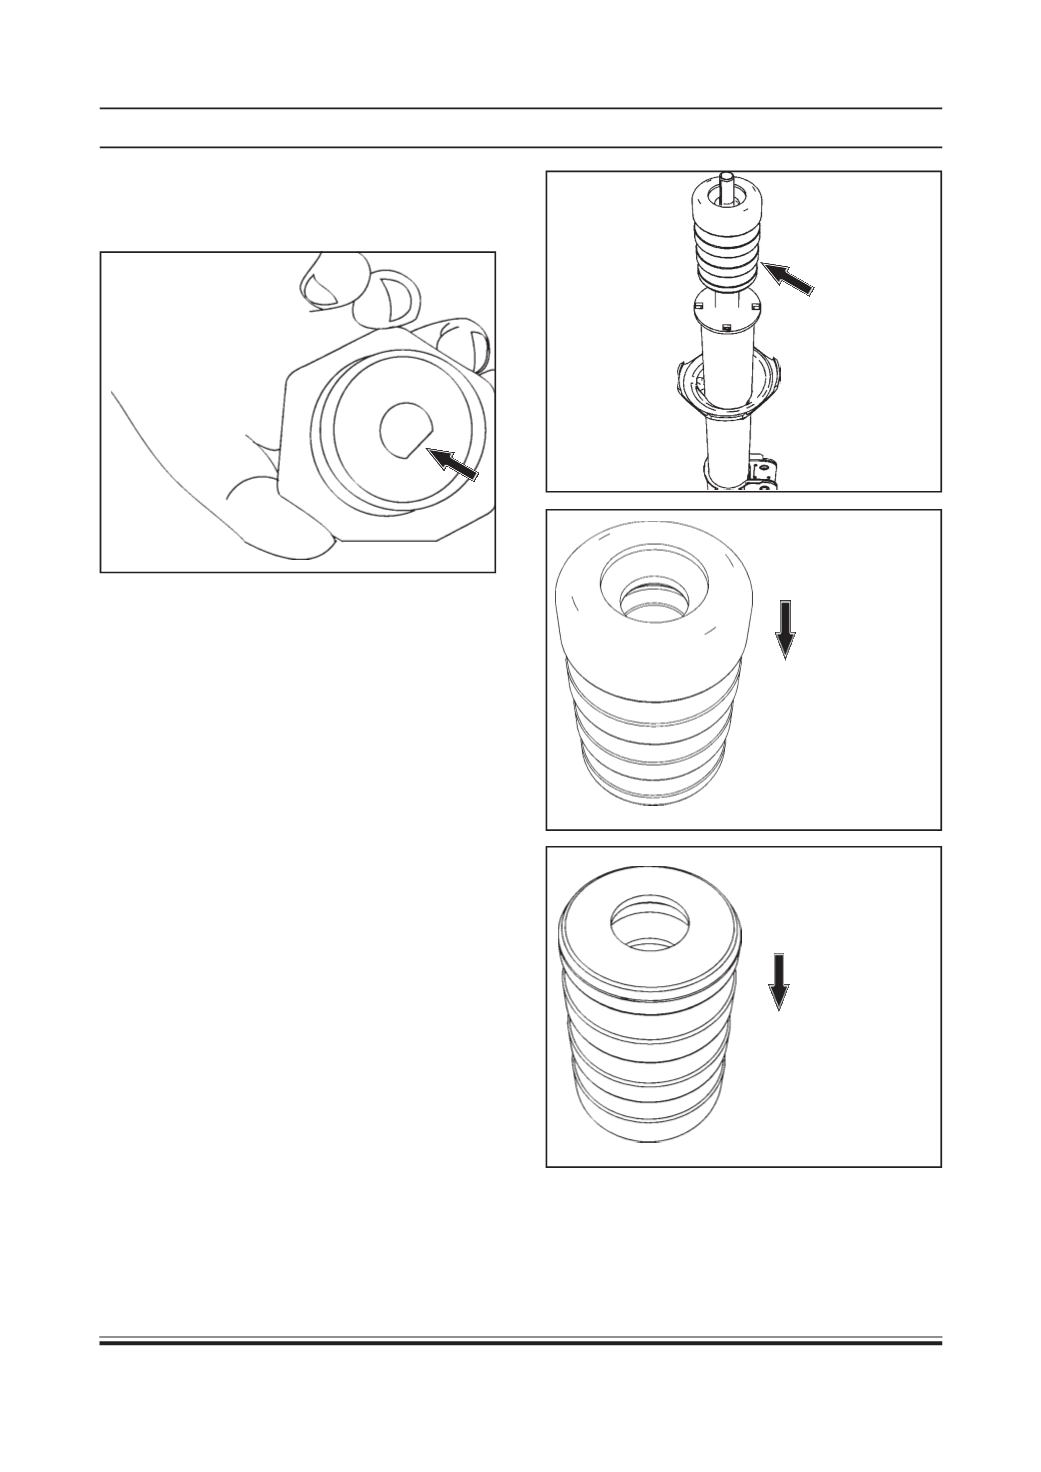
2. Assemble the coil spring such that compressor
tool is on spring seat.
3. Assemble the rubber seat inside the spring seat
and assemble it on coil spring.
4. Assemble thrust bearing on spring seat.
Wrong
direction of
insertion.
5. Remove support cup assembly (11) & stopper (12)
CAUTION:
Check stud threads of support cup
assembly. If found damaged, replace the support
cup assembly.
6. Remove strut mount (10)
CAUTION:
Check strut mount for any deformation
or cut. If found damaged, replace the mount.
7. Remove mount seat (09) and dust seal (08)
NOTE:
Check the dust seal for cracks. If found
any cracks, replace the seal.
8. Remove bearing seat (07) followed by bearing (06)
and spring seat (05).
9. Remove spring with spring compressor.
CAUTION :
While removing the coil spring care
should be taken such that piston rod, outer tube
and bump stopper do not get damaged.
10.Remove bump stopper (03)
CAUTION:
Check for any crack or deformation. If
found any, replace bump stopper.
4. Take out inner support (13)
NOTE:
Check for any deformation or damage to
inner support.
Bumper
Stopper
Correct
direction of
insertion.
Inspection of removed components
1. Check/inspect individual component of strut
assembly and replace the damaged or worn parts.
Assembly
1. Assemble bump stopper on piston rod.
CAUTION:
Direction of bump stopper should be
such that flat portion is on bottom side and groove
portion is on top.