


 433 / 896

SUSPENSION SYSTEM
445
SUSPENSION
OVERHAULING OF STRUT
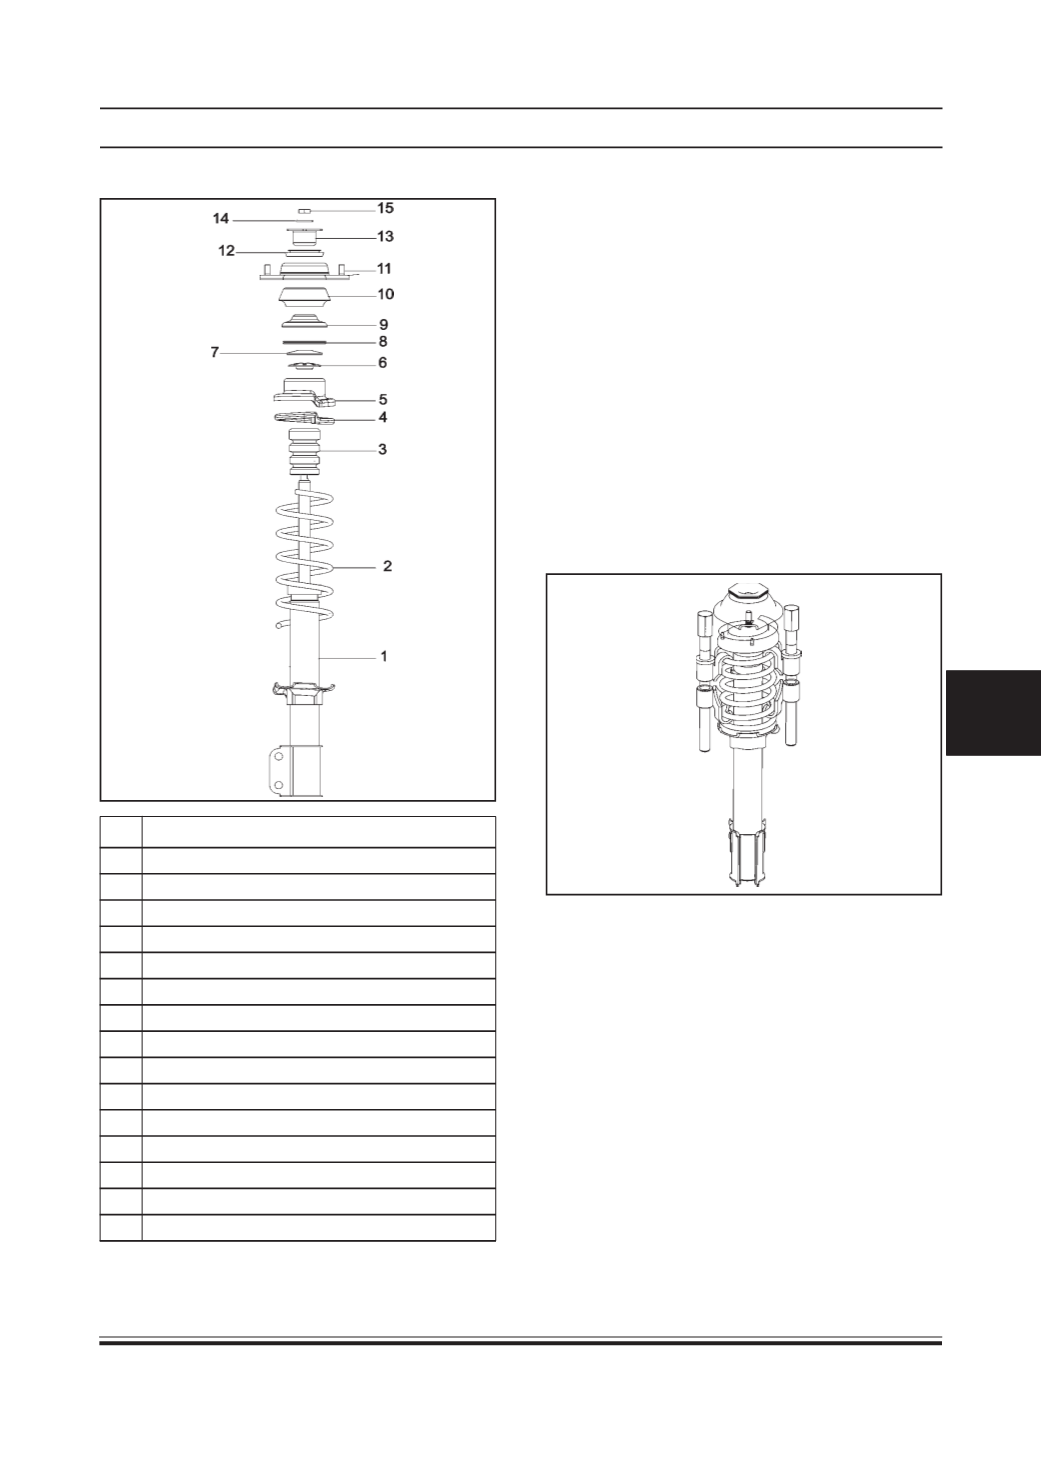
1. Fit the spring compressor tool on strut assembly
as shown below.
CAUTION:
Spring compressor tool should not touch
the damper, dust cover or bump stopper.
2. Tighten spring compressor such that coil spring is
compressed uniformly. Compress the spring until
the spring tension is released.
CAUTION:
After tightening, there should not be
any preload on the cup.
3. Remove hexagonal nut (15) and spring washer (14)
NOTE:
Dispose old spring washer
.
No.
Description
01 Damper
02 Coil spring
03 Bump stopper
04 Rubber seat
05 Spring seat
06 Thrust bearing
07 Bearing seat
08 Dust seal
09 Mount seat
10 Mount
11 Support cup assembly
12 Stopper
13 Inner support
14 Spring washer
15 Hexagonal nut
Disassembly:
WARNING:
(a) When compressing coil spring, be extremely
careful to position the spring compressor properly.
If the spring were to pop out of the compressor,
serious injuries could result.
(b) Do NOT remove the hexagonal nut on the end of
the shock rod before fixing spring compressor
otherwise the unit can fly apart.
NOTE:
1. While overhauling front strut assembly refer fig.
18 for better understanding of the procedure.
2. Use only recommended repair kit while overhauling
process.