


 303 / 948

SUSPENSION
36
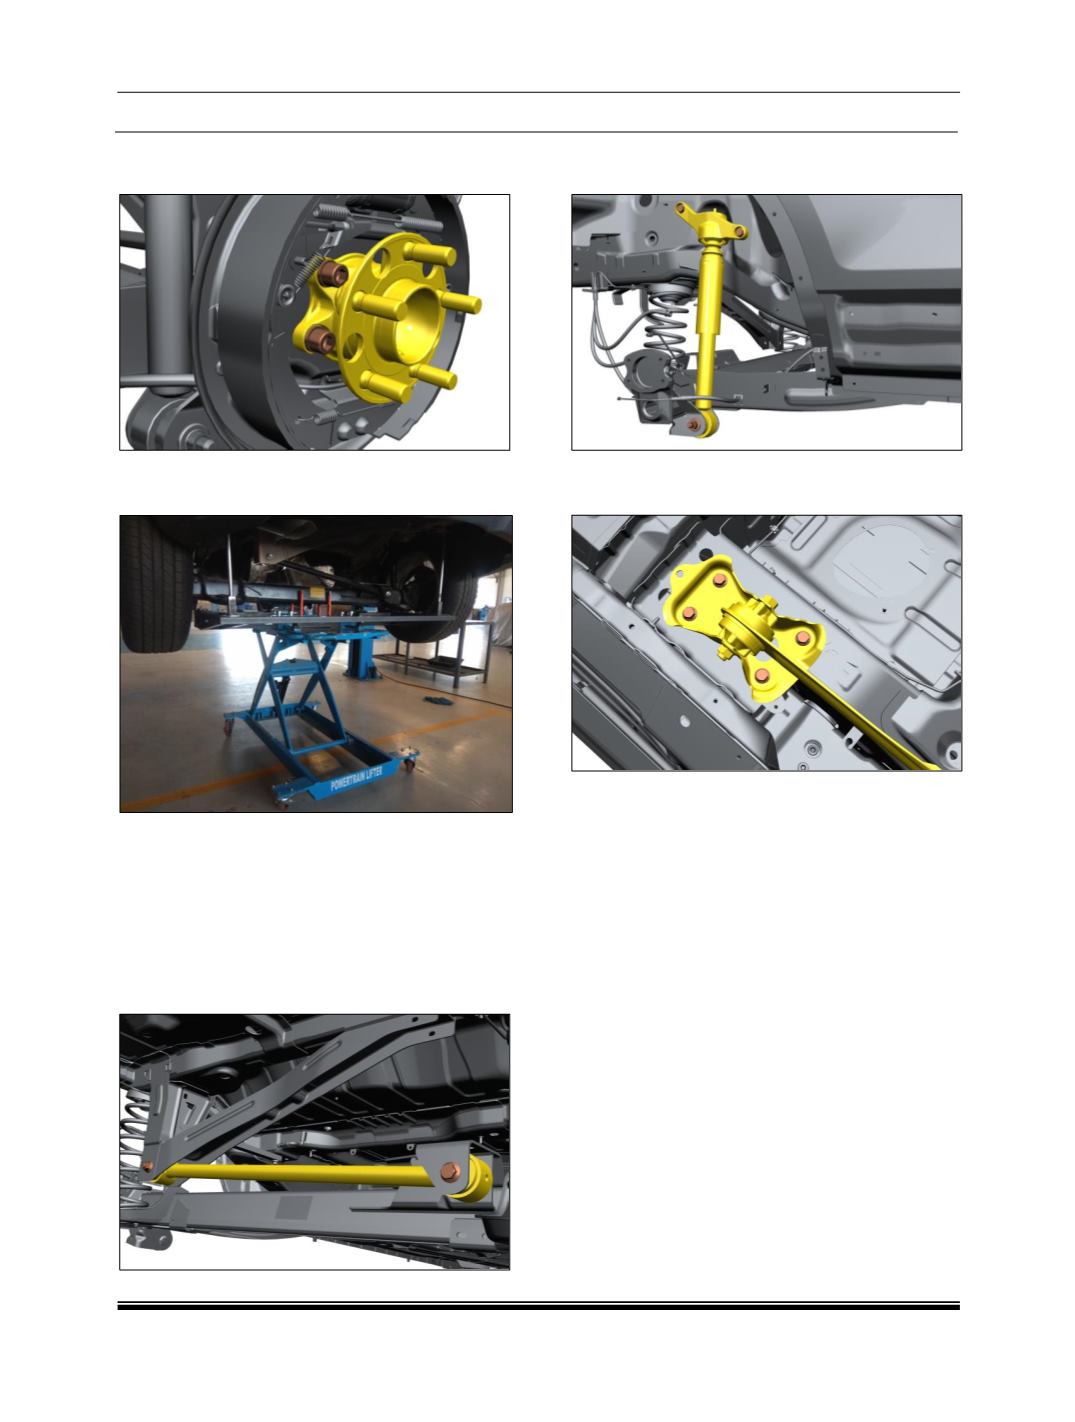
20.Take out bearing Assembly and brake shoe
assembly by removing four allen screws.
21.Support the RTB using lifting trolley
541258900614 & fixture 541258900619.
22.Loosen (Do not remove) Panhard rod both
side mounting bolts.
23.Loosen (Do not remove) RTB pivot bush
LH/RH cross bolt.
24.Loosen (Do not remove) Damper bottom
mounting bolt.
25.Remove the Panhard rod to BIW mounting
bolt.
26.Remove the damper bottom mounting bolt
LH/RH.
27.Remove the Pivot bracket mounting to BIW
mounting 4 bolts LH/RH.
28.After above steps, hold the RTB properly and
slowly lower fixture with the help of jacks
supporting the RTB fixture.
29.Incase of installation fixture is not available
and jack is used as per point no 18, after
above steps, hold the RTB properly and slowly
lower the two jacks supporting the RTB at
equal level.
30.Once the coil springs are sufficiently relaxed
and free to move remove them and now the
RTB can be removed from the vehicle along
with PHR and pivot brackets attached to it
Note:
Tightening with snug torqueing and angle
torqueing of Rear Suspension on body to be done
in ECIE condition only. No jacking to be done on
beam.