


 617 / 1232

DRIVETRAIN-TA65 Star
22
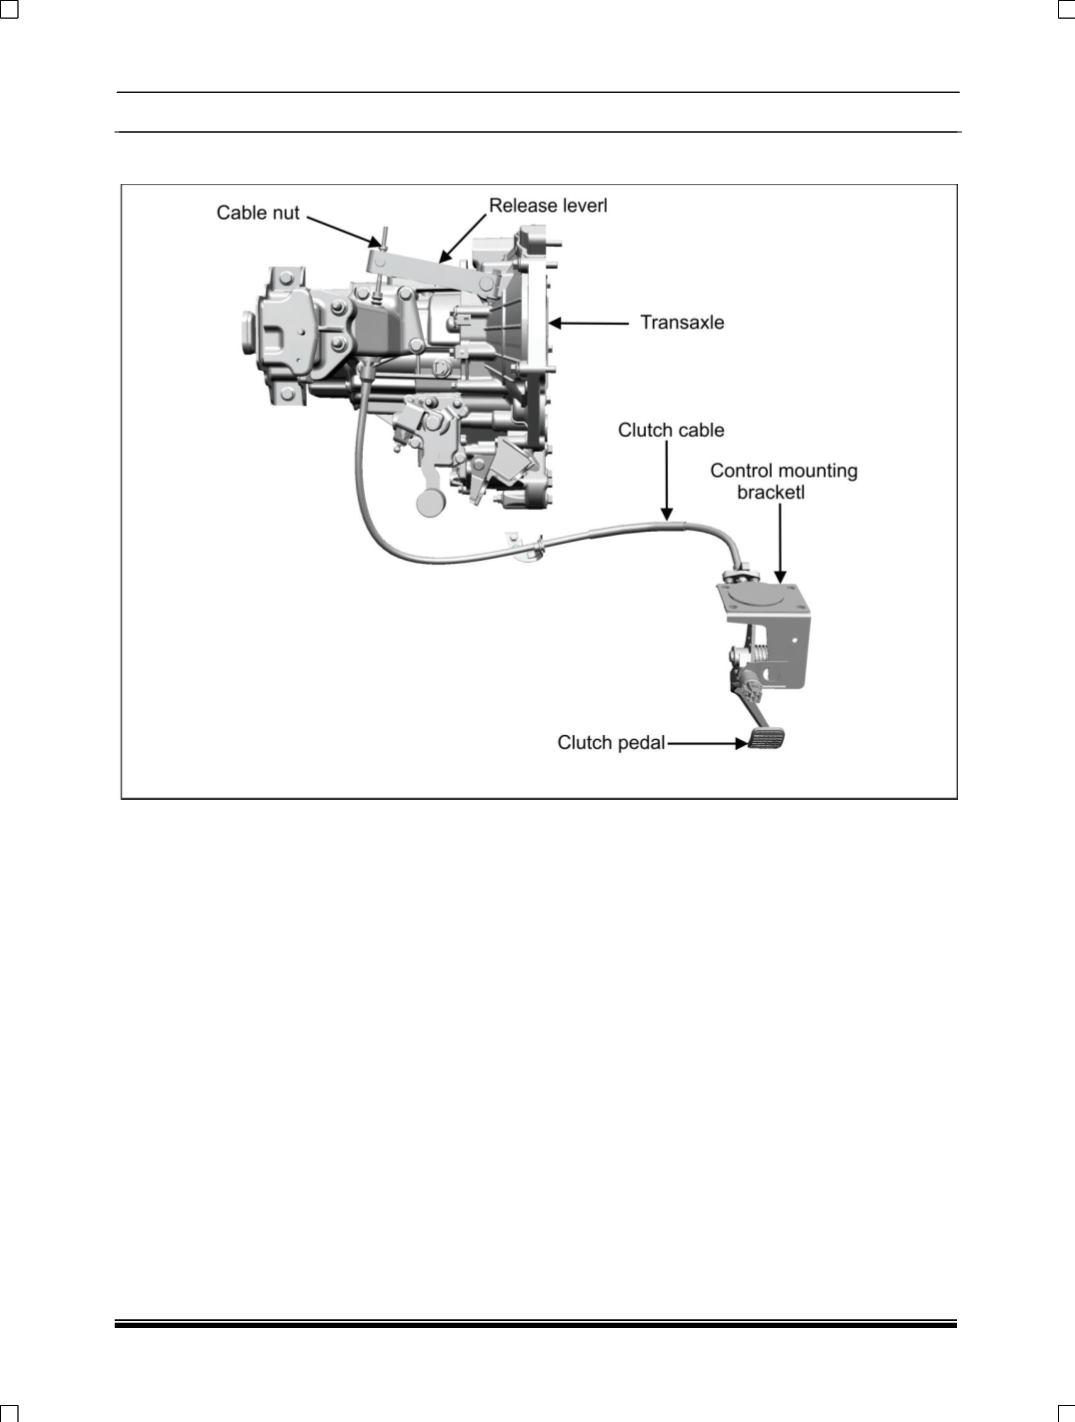
CLUTCH CABLE
5.6. D. CLUTCH CABLE REMOVAL AND
INSPECTION:
REMOVAL
1. Remove the clutch cable nut and disconnect
the joint pin from inner
cable.atthe clutch
housing end.
2. Disconnect the cable from hook at clutch pedal
top.
3. Loosen and remove the two clamps holding of
the clutch cable on the firewall, one at the
transaxle end and other at the engine end.
4. Remove the cable from clamp on transaxle.
5. Similarly loosen and remove the cable at the
passenger compartment clutch end.
INSPECTION
Replace the cable if
a) There are any bends or kinks.
b) The cable is having a worn end.
c) The boots are broken.
INSTALLATION
1. Grease the joint pin and cable end hook.
2. Fix properly the clip for holding clutch cable on
firewall inside cabin.
3. Hook the cable end with pedal from inside the
cabin.
4. Join the inner cable with joint pin in release
arm.
5. Ensure the heat resistant sleeve is in front of
the exhaust front pipe.
6. Fix LH side cable holding clamp on firewall.
Ensure that cable is free in the clamp.
7. Adjust the pedal height according to
specifications after the clutch cable nut is
fastened on to the cable.
8. Finally check the clutch for proper functioning.