


 701 / 1232

SUSPENSION
22
6.7.4.2 REMOVAL AND INSTALLATION
LOWER ARM BALL JOINT
A) Removal process
a) Support (part no.
5427 5890 32 01) to be
used for ball joint removal.
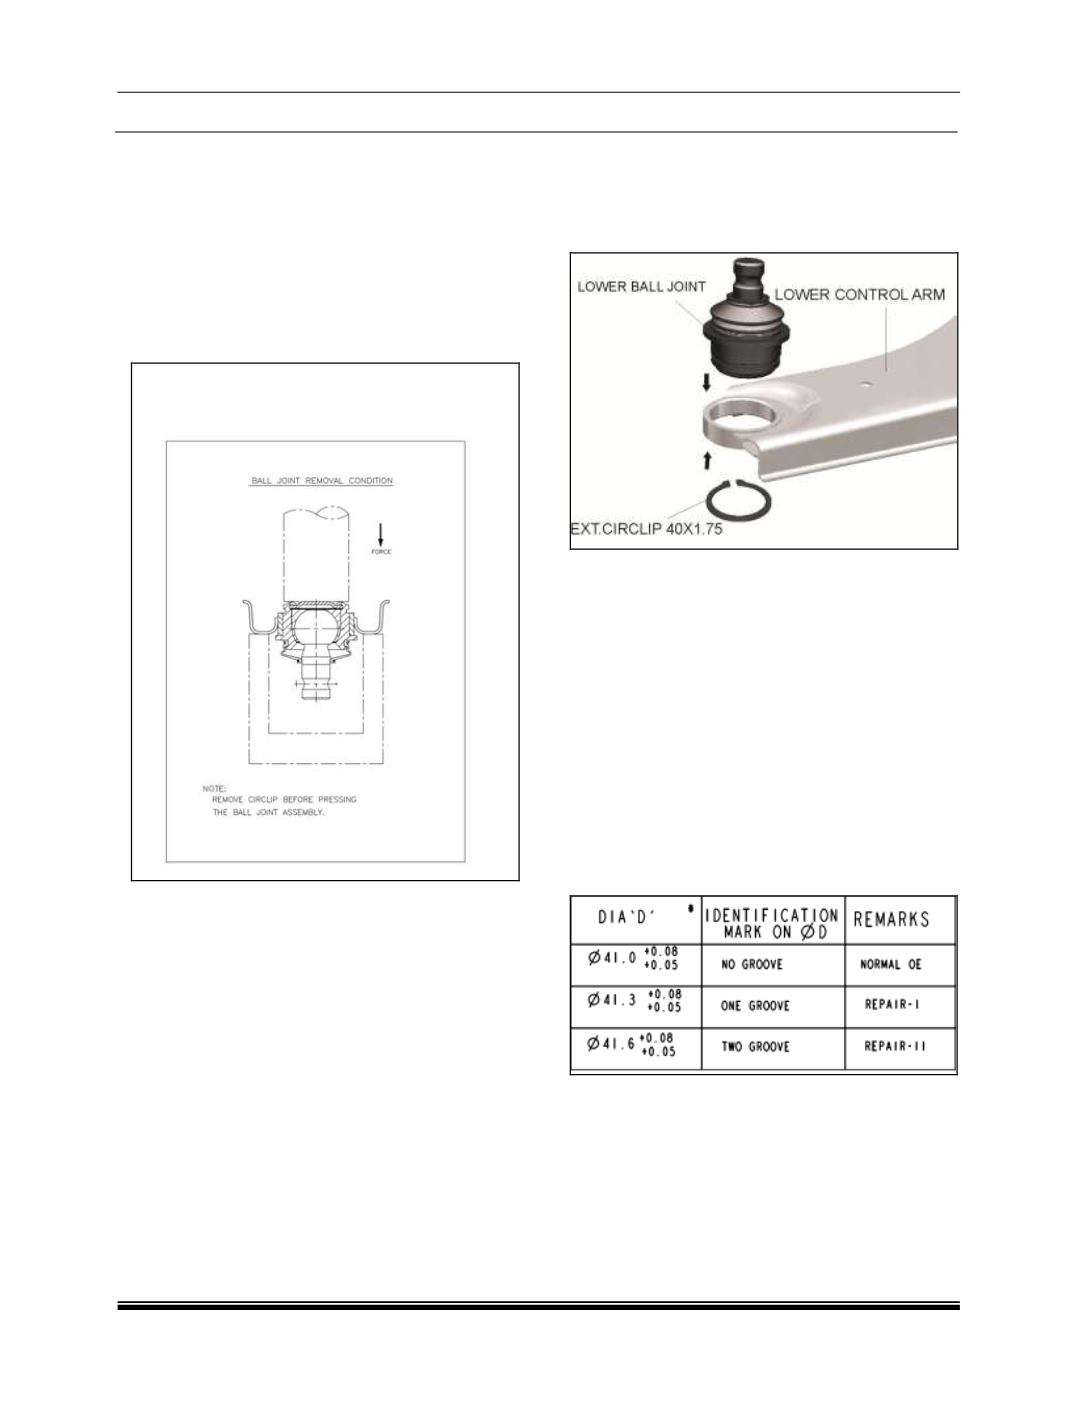
b) Circlip to be removed before dismantle the
ball joint assembly from control arm.
c) Ball joint to be removed on hydraulic press.
d) Push out load to be applied on sealing
periphery (peened area) using special tool
(part no 2834 5890 26 14) without
contacting the back plate.
B) Fitting process-
a) Support (part no 5427 5890 32 01) to be
used for ball joint assembly on lower control
arm.
b) Ball joint to be fitted on hydraulic press.
c) Extra care to be taken during fitment to
avoid damage & boot puncher.
d) Apply pressing load using special tool (part
no 2779 5890 35 01) ball joint housing collar
until collar face butt with mating bush.
e) Circlip to be assembled after adequate
fitment of ball joint.
NOTE:
Ball joint assembly type repair-1 having bigger OD
to be used while replacement of ball joint first time
and repair 2 for second times.
Ball Joint Repair Sizes