


 1067 / 1131

HVAC
56
1.3.8. HVAC UNIT
REMOVAL
1. Discharge the refrigerant using standard recover-
ing equipment.
2. Remove dashboard with cross car beam assem-
bly.
(For procedure, refer dashboard removal with
cross car beam in body section.)
3. Disconnect all electrical connections.
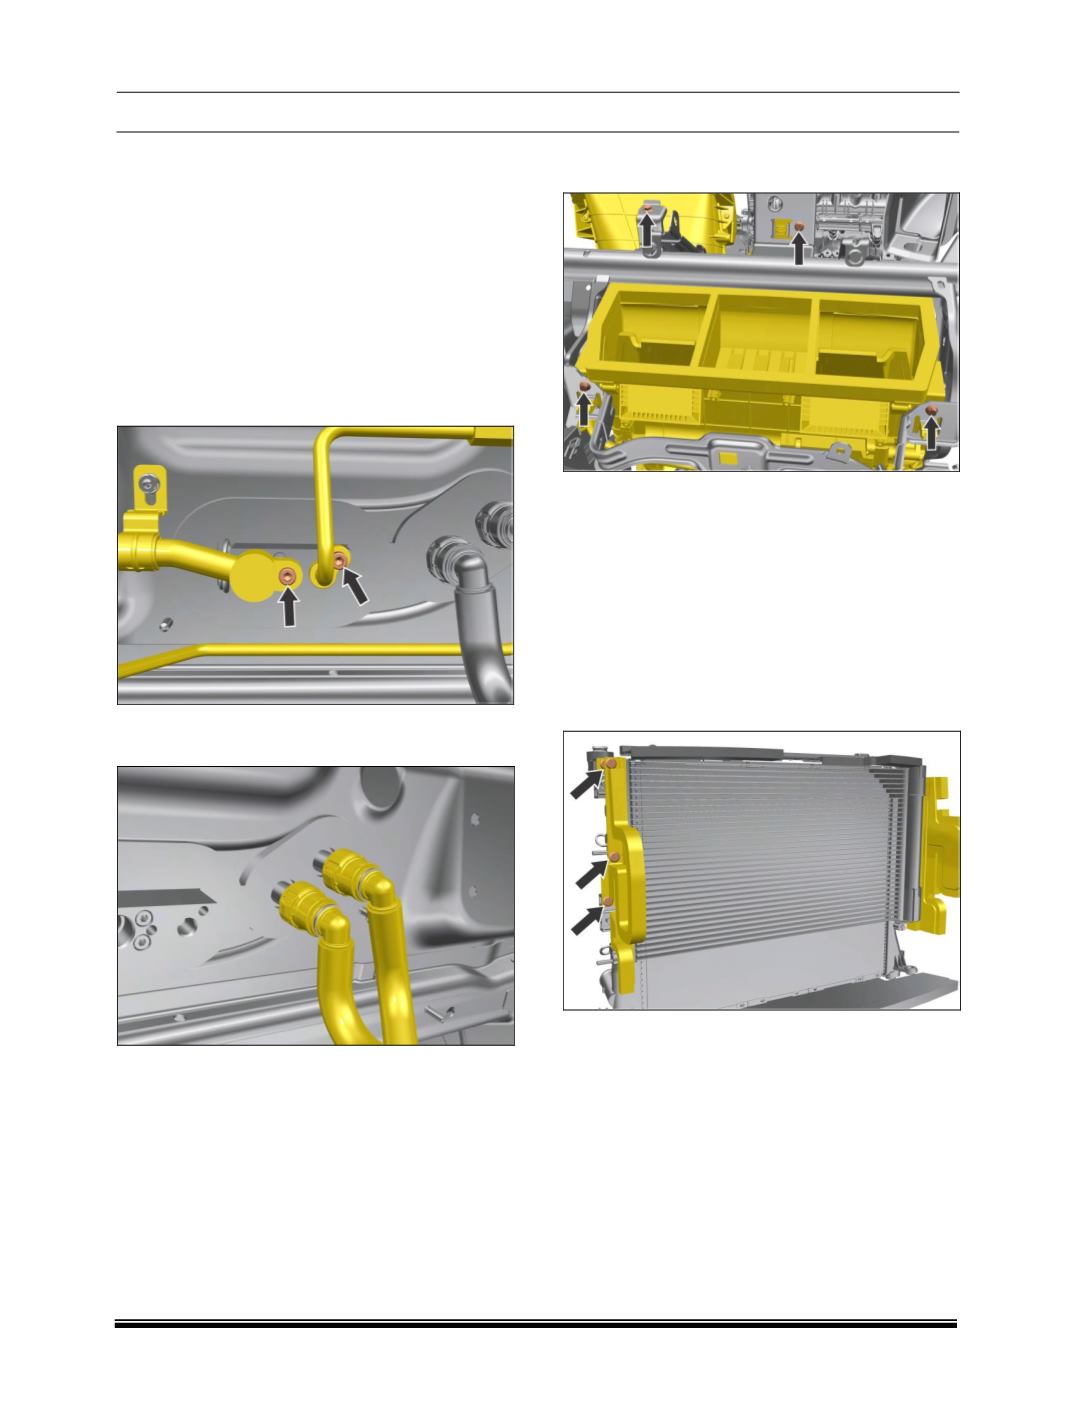
4. Loosen and remove bolts and disconnect the inlet
and outlet lines i.e. high pressure line and low
pressure line and plug the ports.
5. Disconnect the Heater inlet and heater coil outlet
pipes.
WARNING
The heater pipes contain hot coolant which may
spill out when disconnected, even if the coolant is
drained, so be careful while disconnecting them.
Keep a suitable container below it to collect the
coolant that will flow out.
6. Loosen and remove mounting bolts as shown in
figure below and take out the HVAC unit.
FITMENT
For fitment follow the reverse procedure of removal.
1.3.9. CONDENSER SEALING DUCT
REMOVAL
1. Remove the bumper (Refer Body section).
2. Open the bonnet.
3. Remove horns from both ends.
4. Loosen and remove mounting screws.
FITMENT
For fitment follow the reverse procedure of removal
.