


 653 / 1236

BRAKES
27
BRAKES
C. CALIPER PAD REPLACEMENT
NOTE
Caliper pad replacement for front and rear caliper
can be done in similar manner, therefore follow
the same procedure of caliper pad replacement
for removal of rear caliper pads after removal of
rear tyres.
1. Keep the gear shifter lever in neutral position.
2. Apply the parking brake.
3. Jack the vehicle and remove the front wheel.
4. Loosen and remove the bottom sliding pin bolt.
NOTE
Before removing the sliding pin bolt, ensure that
the pedal is fully depressed i.e. caliper is fully
returned at zero condition.
5. Swing the caliper up, hold with one hand and
then remove the pads one after the other.
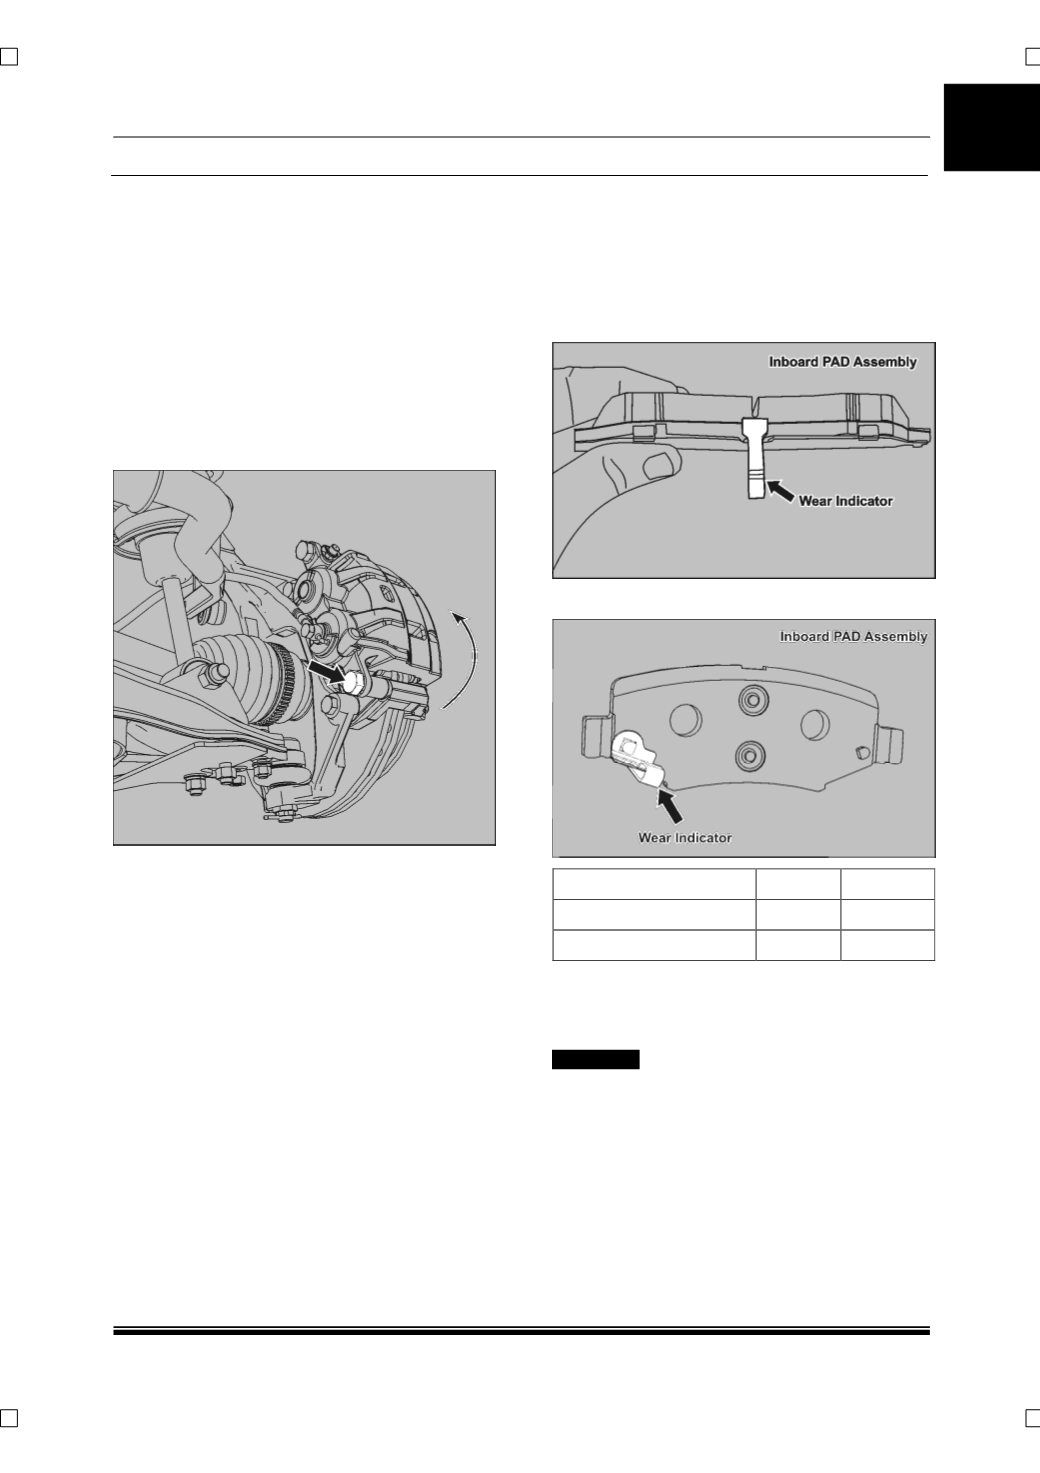
INSPECTION
Measure the pad lining thickness if it is found to
be 1mm or less anywhere, it has to be replaced.
The inboard pads of front and rear brakes are
provided with the wear indicator.
1. FRONT BRAKE PAD INDICATOR
2. REAR BRAKE PAD INDICATOR
PAD
Front
Rear
PAD lining thickness
11.3mm
10.0
Useful PAD Thickness
10.3 mm
9.0
FITMENT
For fitment follow the reverse procedure of
removal.
! CAUTION
•
The inboard pads are provided with wear
indicator assembly. Since the inboard pad and
shims are not inter-changeable.
•
In rear caliper, only inboard pad has clip-on
shim. Outboard pad doesn’t have shim.
•
Do not polish the pads with sand or emery
paper as hard particles of sand or emery paper
will deposit on pad and may damage disc.