


 1341 / 1525

6
CLUTCH
l
Remove circlip and then washer, holding clutch
assistance mechanism with clutch pedal.
l
Remove clutch assistance mechanism carefully.
l
Remove two hex nuts holding clutch pedal with
mounting bracket. Take out hex bolt and remove
clutch pedal. Remove collar bush ( of master
cylinder fork mounting ) clutch pedal.
l
If clutch pedal bush is to be replaced, remove it
with suitable punch.
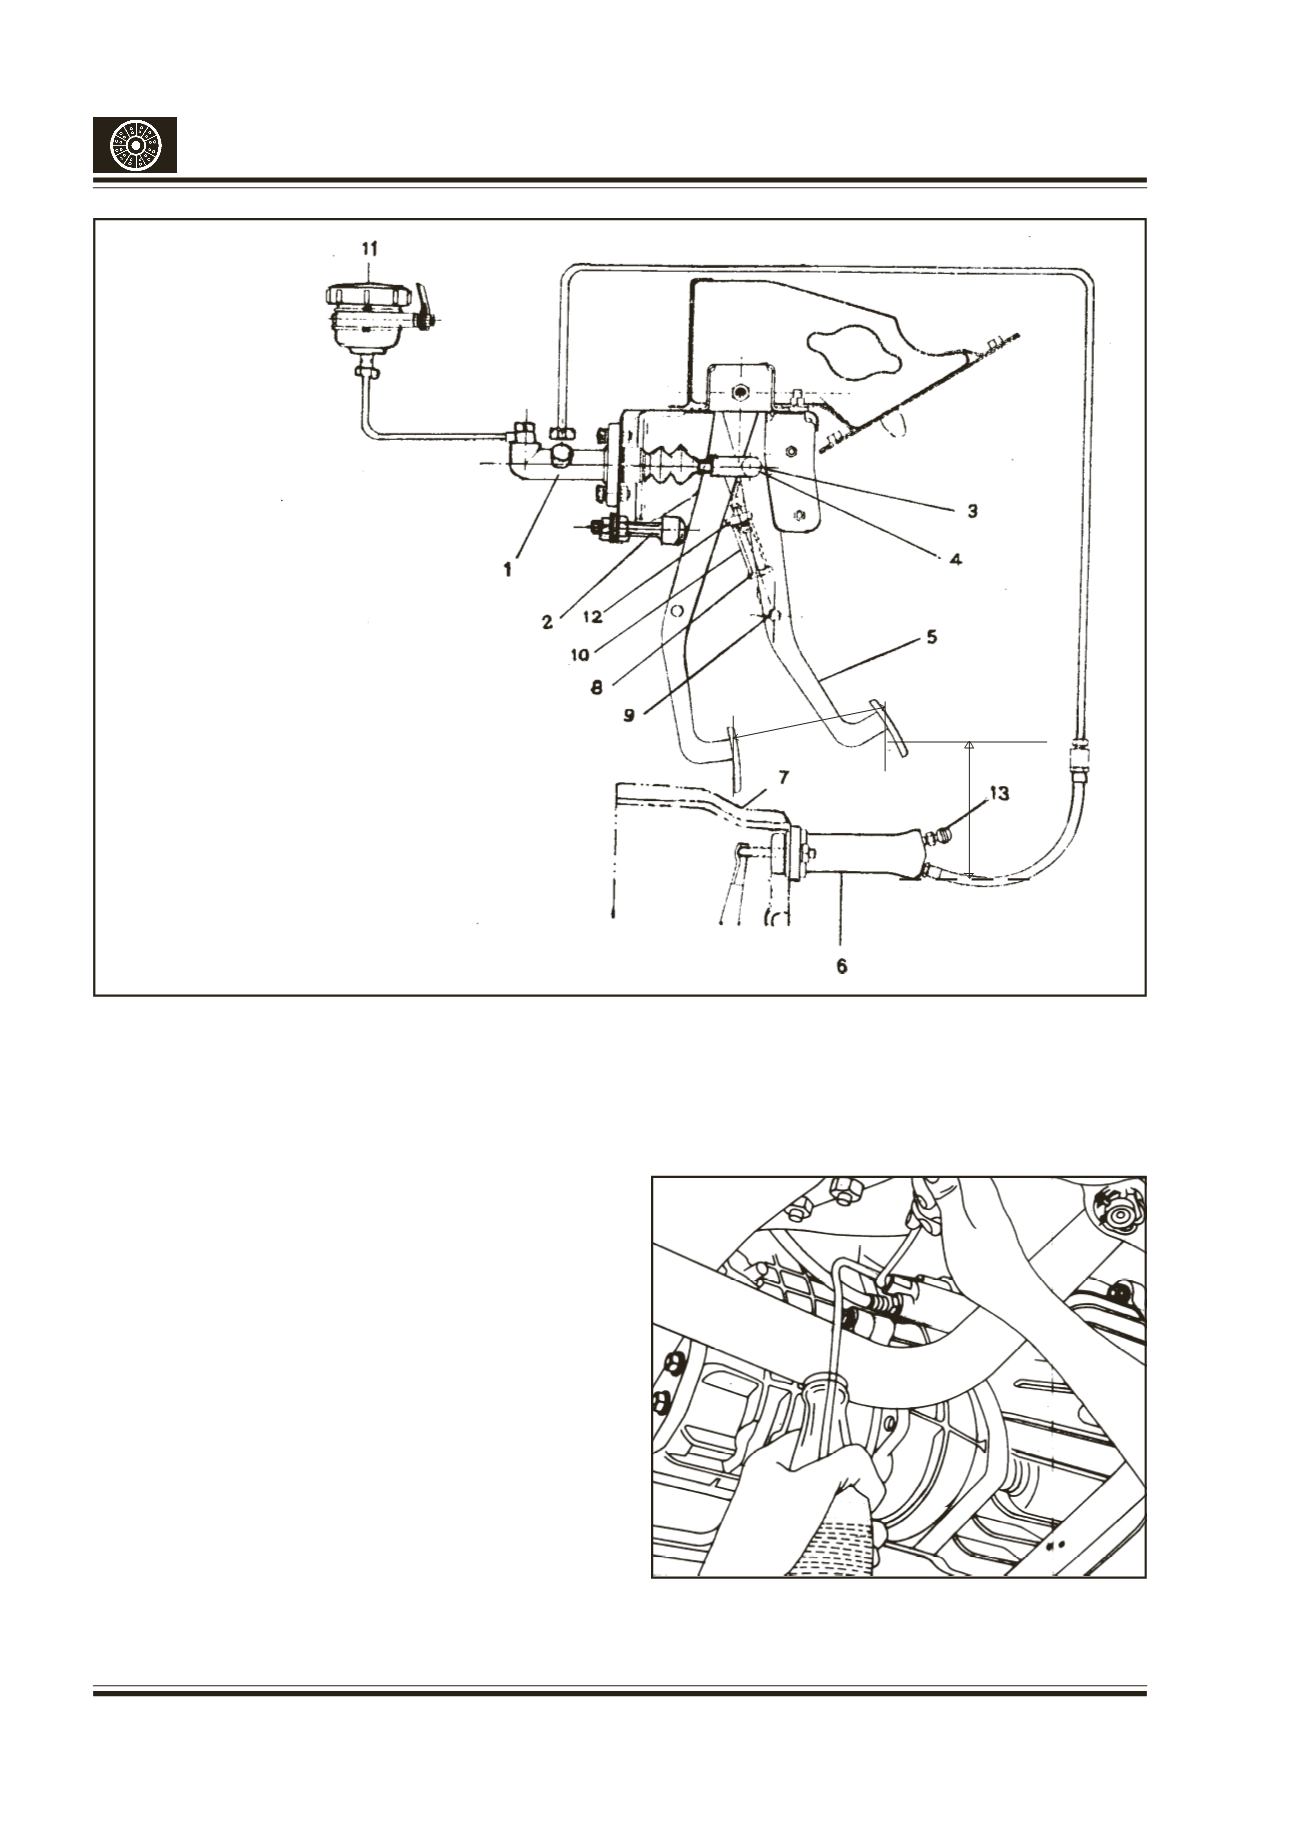
Fig.5- Clutch Actuation Mechamism
1. CLUTCHMASTERCYLINDER
2. CLUTCH PEDAL STOPPER
3. SPLIT PIN
4. CLEVIS PIN
5. CLUTCH PEDAL
6. SLAVE CYLINDER
7. CLUTCH HOUSING
8. ASSEMBLY STAY ROD
9. CIRCLIP
10. COMPRESSION SPRING
11. CLUTCH FLUID RESERVOIR
12. PIVOT PIN
13. BLEEDING NIPPLE
Fig.5- Pumping out clutch fluid
160 + 5mm
188mm
Floor