


 17 / 138

16
Diagnostic Manual
•
Check battery cables tightening torque on
posts.
•
Ensure for adequate fuel level
•
Check Gauges & Warning Lamps on
instrument cluster.
•
Check engine oil level and condition.
•
Check coolant level and condition.
•
Check for any leakage through loose joints /
hoses etc.
•
Look for vehicle service history for previous
repairs information.
• Check engine, sensors & system parameters
values to see if any sensor values are out of
min/max range. The out of range parameter
possibly give indication about the source of
complaint.
Step 4 - Diagnosing the Concern
It is important to follow a sequence than to
approach in a haphazard manner. Service tech-
nician should follow a systematic procedure for
accurate diagnosis. It is important to plan the
sequential checks based on symptom for
eliminate the obvious causes of the complaint like:
•
Check the DTC’s with the help of TML
Diagnostic tool & follow the instructions.
•
Record the DTC’s freeze frame details & com-
pare the ECU Parameters with known good
vehicle, if required.
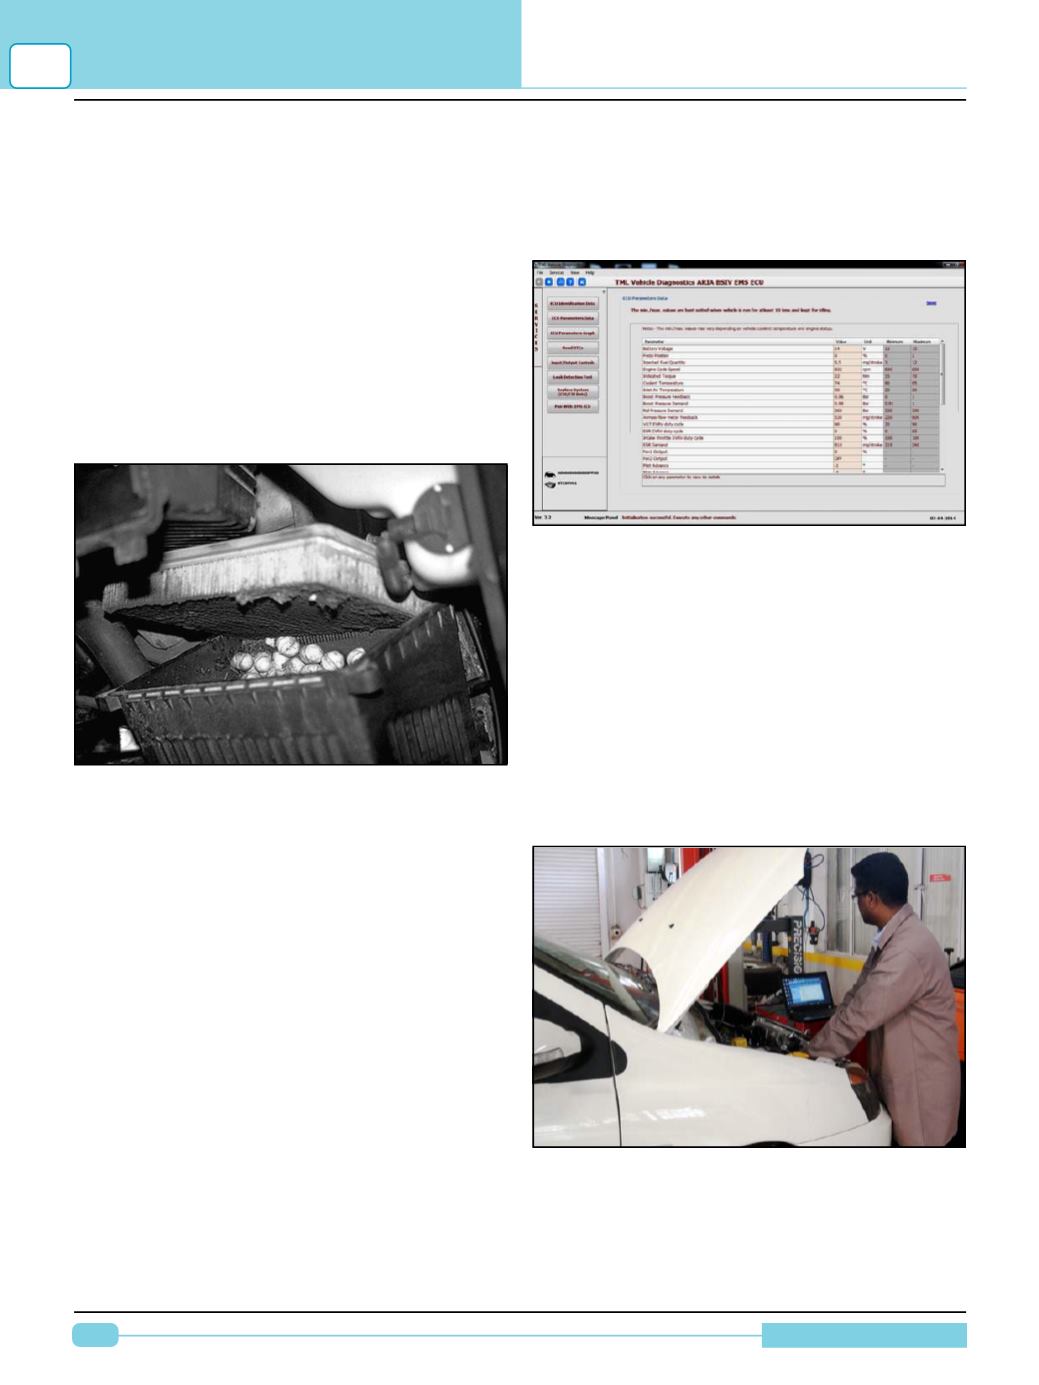
FIG.4 - looking carefully at the TML
Diagnostic tool data is very helpful in
locating the source of a problem.
Narrow the Problem to a System or Component
•
Identify the vehicle systems involved (e.g. AC
system / electrical system)
•
Identify the faulty component (e.g. compressor/
fuse blown off)
•
Identify what caused the fault (e.g. high belt
tension/ short circuit)
It is clear that one needs to have information
on the following to do accurate resolution.
•
Knowledge of the system basics and
operation
FIG.5: Diagnosing the concern
SEVENSTEPSDIAGNOSTIC APPROACH
4
FIG. 3 : This is what was found when
removing an air filter from a vehicle that
had a lack-of-power concern. Obviously the
nuts were deposited by squirrels or some
other animal, blocking a lot of the airflow
into the engine.
(Photo used only for reference)